

Creating Workspot Template for AWS EC2
This article is a quick guide for adding a Microsoft Windows template to use with your Amazon AWS EC2 deployment. It is part of the Getting Started with Workspot article series.
Step by step:
- Create a Windows 10 VM in a virtualized environment such as Hyper-V using ISO image.
- Install all the latest updates on the VM.
- Export the VHD of the Windows 10 VM.
Uploading VHD to AWS S3 bucket:
- Upload VHD to AWS S3 bucket using AWS CLI (command line interface). Install AWS CLI in the local machine if needed.
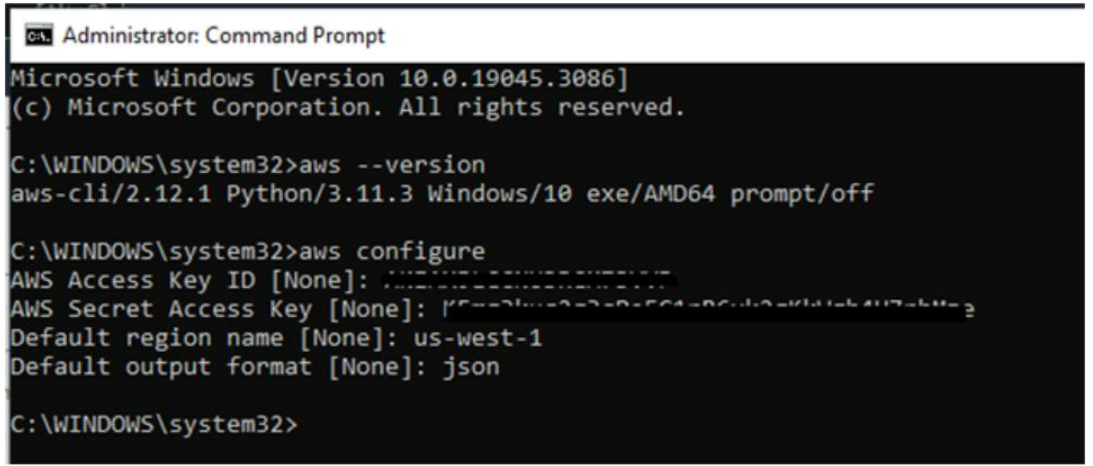
- Connecting to AWS account
aws --version
aws configure
- AWS commands to create a S3 bucket and upload VHD to the bucket.
aws s3 mb s3://workspotbucket
aws s3 ls
aws s3 cp win10_21h2_vm.vhd s3://workspotbucket

Create an AMI with the uploaded VHD:
- 3 configuration JSON files will be used from the local machine to create an AMI from VHD.
VM Import/Export requires a role to perform certain operations on your behalf. You must create a service role named vmimport with a trust relationship policy document that allows VM Import/Export to assume the role, and you must attach an IAM policy to the role.
To create the service role:
1. Create a file named trust-policy.json on your computer. Add the following policy to the file:
{
   "Version": "2012-10-17",
   "Statement": [
      {
         "Effect": "Allow",
         "Principal": { "Service": "vmie.amazonaws.com" },
         "Action": "sts:AssumeRole",
         "Condition": {
            "StringEquals":{
               "sts:Externalid": "vmimport"
            }
         }
      }
   ]
}
2. Use the create-role command to create a role named vmimport and grant VM Import/Export access to it. Ensure that you specify the full path to the location of the trust-policy.json file that you created in the previous step, and that you include the file:// prefix as shown the following example:
aws iam create-role --role-name vmimport --assume-role-policy-document "file://C:\import\trust-policy.json"
3. Create a file named role-policy.json with the following policy, where disk-image-file-bucket is the bucket for disk images:
{
	"Version": "2012-10-17",
	"Statement": [
		{
			"Effect": "Allow",
			"Action": [
				"s3:GetBucketLocation",
				"s3:GetObject",
				"s3:ListBucket"
			],
			"Resource": [
				"arn:aws:s3:::<disk-image-file-bucket>",
				"arn:aws:s3:::<disk-image-file-bucket>/*"
			]
		},
		{
			"Effect": "Allow",
			"Action": [
				"ec2:ModifySnapshotAttribute",
				"ec2:CopySnapshot",
				"ec2:RegisterImage",
				"ec2:Describe*"
			],
			"Resource": "*"
		}
	]
}
4. Use the following put-role-policy command to attach the policy to the role created above. Ensure that you specify the full path to the location of the role-policy.json file.
aws iam put-role-policy --role-name vmimport --policy-name vmimport --policy-document "file://C:\import\role-policy.json"
5. The following is an example container.json file that specifies the image using a URL in Amazon S3.
[
{
"Description": " My Win10 Enterprise",
"Format": "vhd",
"Url": "s3://my-import-bucket/vms/my-win10-vm.vhd "
}
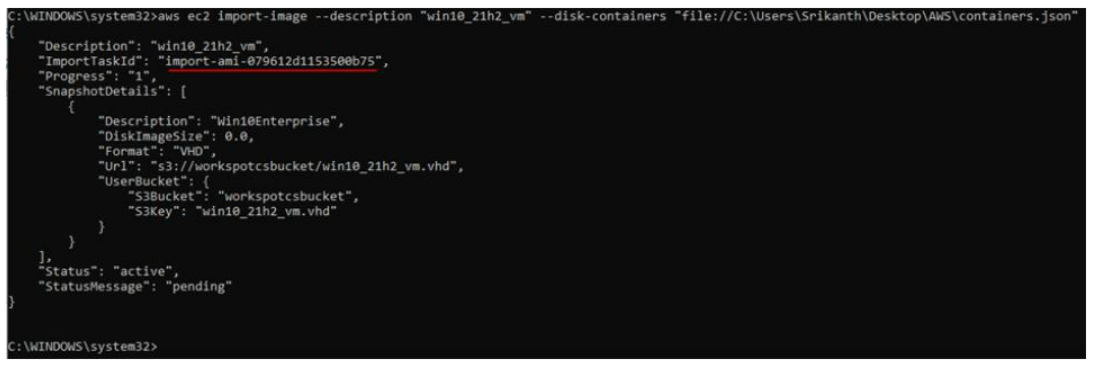
]6. Import an image using the below command which creates an AMI:
aws ec2 import-image --description "My server VM" --disk-containers "file://C:\import\containers.json"
- Following 3 JSON files were created in our AWS EC2 implementation.
- Screenshots of AWS commands which were run to create the AMI:
Create-role vmimport command, however vmimport role already exist for this AWS account.

Put-role-policy command

Create AMI import image command
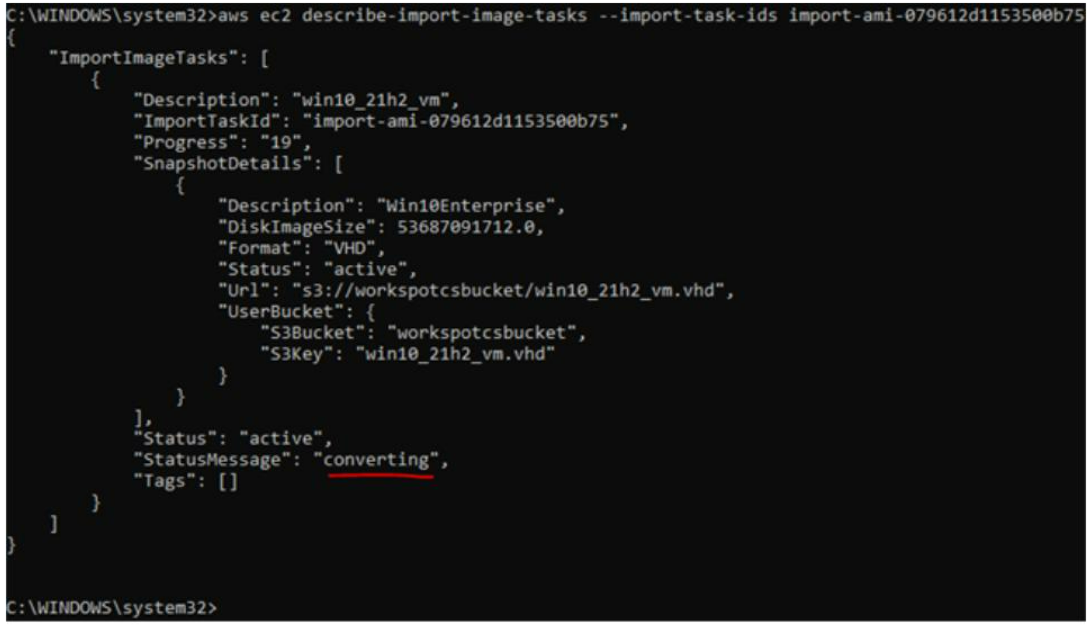
AMI image conversion progress command (with import task id)
Configuring Template VM:
- Create a Template EC2 Instance VM (cs-ec2-win10-template) with the custom AMI.
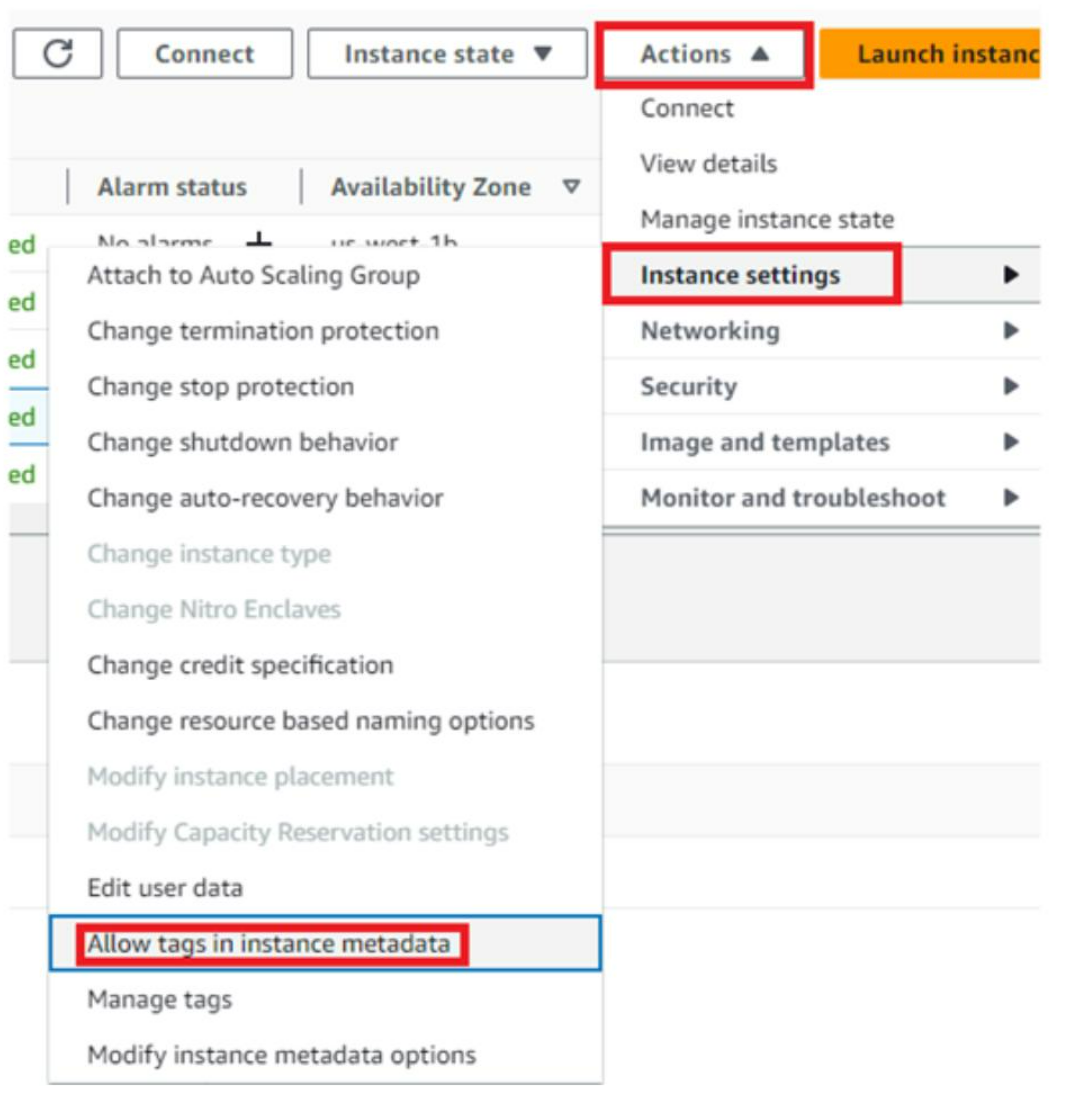
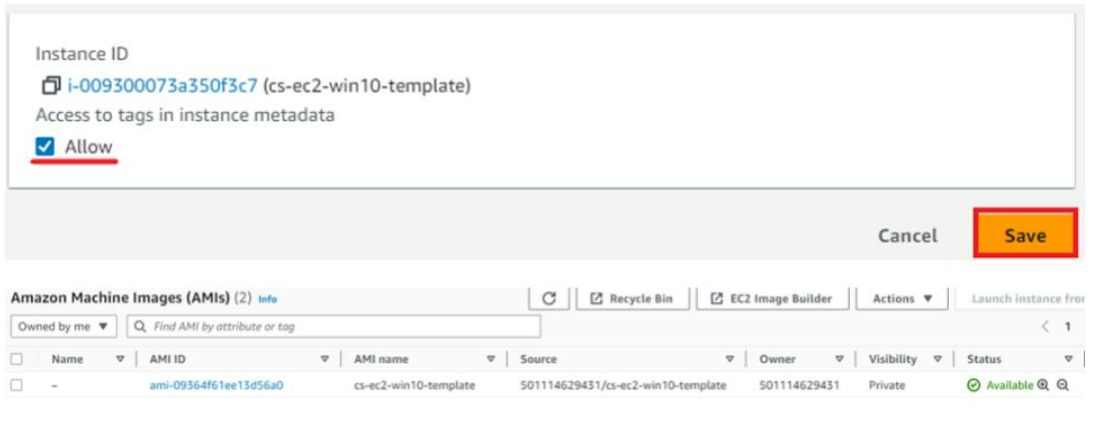
- Ensure tags are allowed in instance metadata for the EC2 instance. Note: Do this step before installing the Workspot Agent. The Workspot agent installation will leverage the instance metadata to capture template details.
- Login to the Template EC2 instance through utility server, download and install WS Agent.
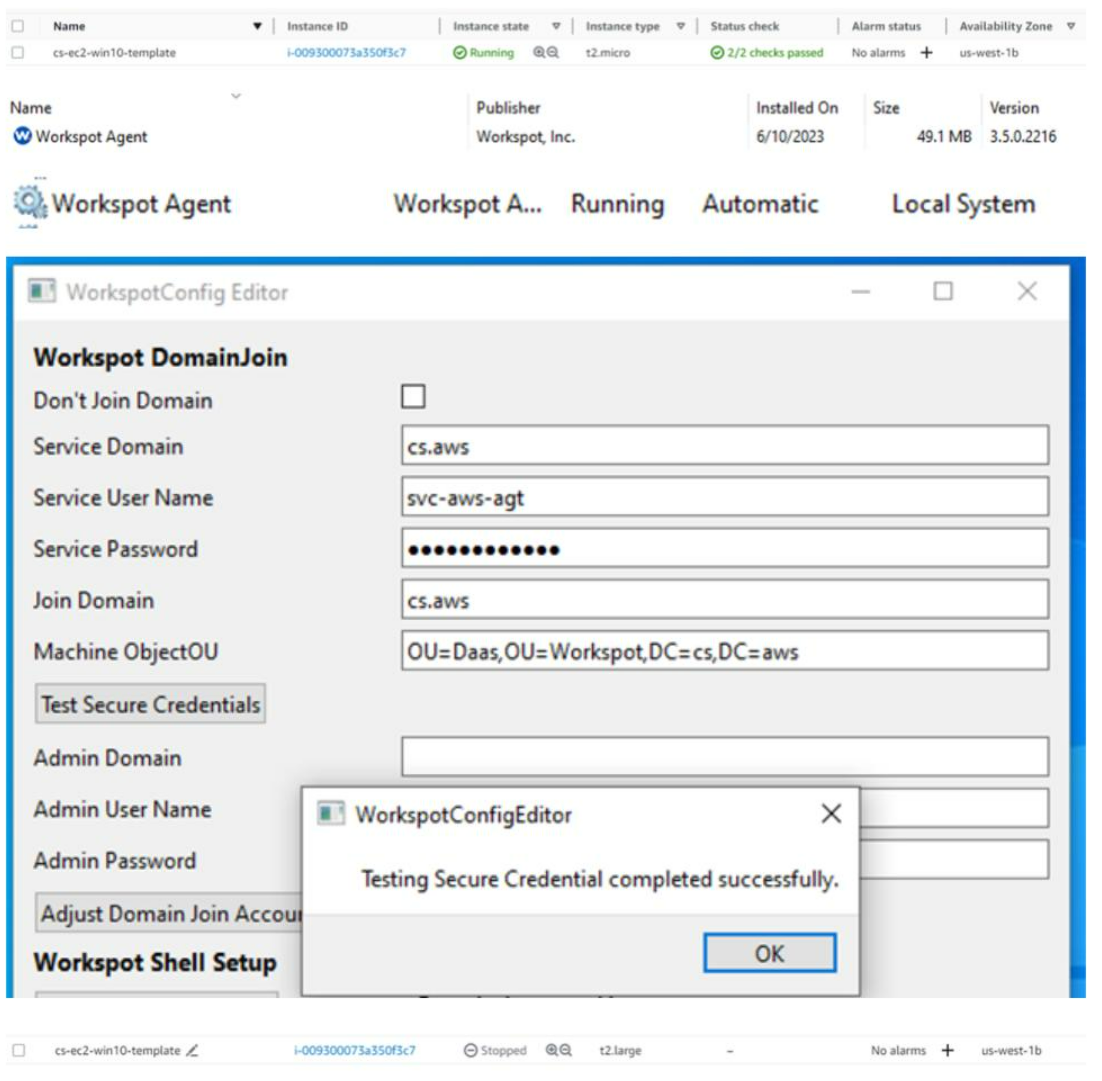
- Configure XML file with appropriate domain join values.
- Install the custom applications, run optimization scripts, and install latest windows patches.
- Shutdown the EC2 instance.
- Create AMI from the EC2 instance with SAME NAME as the the Template EC2 instance VM. Note: It is important that the new AMI name matches the template EC2 instance as Workspot Control will query the AMI list for the EC2 instance name.
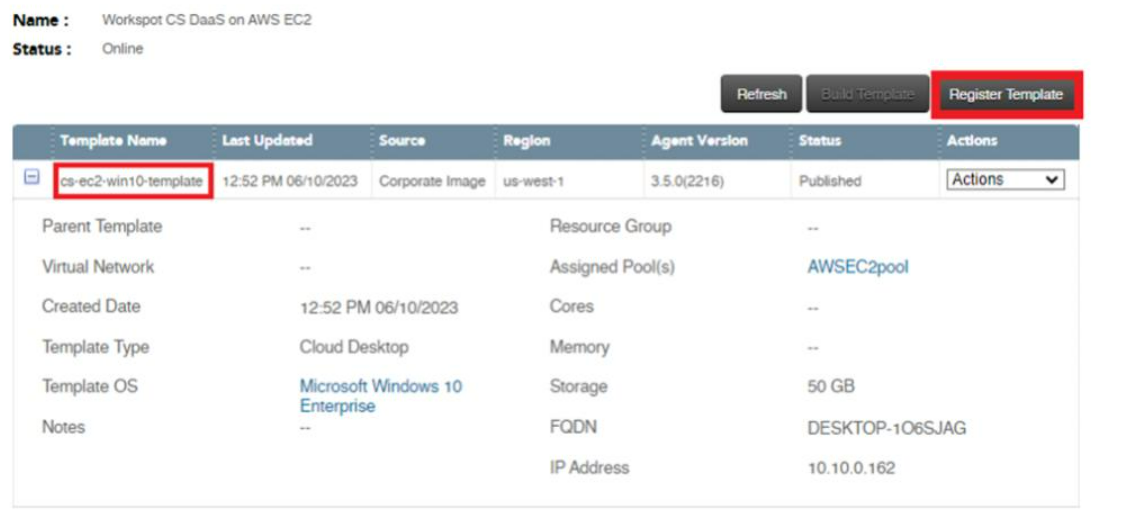
- Register in Workspot Control.