Using Okta with Workspot
by Robert Plamondon
Last updated on December 7, 2023
Workspot Control supports optional Workspot Client authentication via some third-party OIDC (OpenID Connect) identity providers, initially Okta. Once enabled, Client users authenticate with the identity provider before using Workspot desktops and apps.
How it Works
You define an identity provider profile in Control and the identity provider's portal.
In Control, you assign identity provider profiles to selected Workspot Managed RD Gateways. All Client sessions passing through a gateway is required to use its identity provider.
Different gateways can require different authentication, allowing mixed installations and non-disruptive site upgrades.
Signing Into the Client
- When third-party identification is required, the Client must provide a valid authentication token to sign into the Workspot Client.
- If the Client doesn’t already have a non-expired authentication token, it pops up the third-party identity provider’s sign-in window.
- The end-user signs in (using whatever multi-factor authentication is required according to the rules you set up with the identity provider, and the provider returns an authentication token.
- The Client notes the valid token and signs the user in.
First-Time Use (Client Registration)
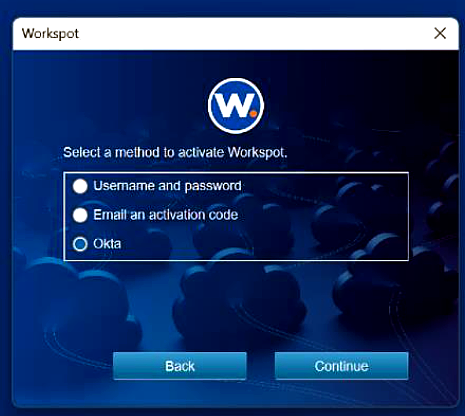
When the end-user signs into the Client for the first time, the Client must be registered with Control before it can connect to any Workspot resources. There are three ways the end-user can do this:
- By signing in via Okta, as above.
- By signing with their AD account credentials.
- By requesting a validation email and entering the code contained in the email.
The email option can be deselected in Control if desired.
The reason for having multiple registration methods is that Okta is not a global option but is selected on a per-gateway-cluster basis, as described below. Thus, some end-users may not be Okta users.
Signing into a Workspot Desktop/App
Okta/OIDC sign-in is selectable on each Workspot Managed Gateway Cluster. When enabled, the Client forwards the authentication token to the gateway, acquiring a new one if necessary.
The Workspot desktop/app may require an additional sign-in. Desktop/app credentials are cached by the Client unless this is forbidden by the Control administrator, so the end-user does this only once.
Configuring in Control
Identity Providers are configured in Workspot Control on the "Settings > Identity Providers" page.
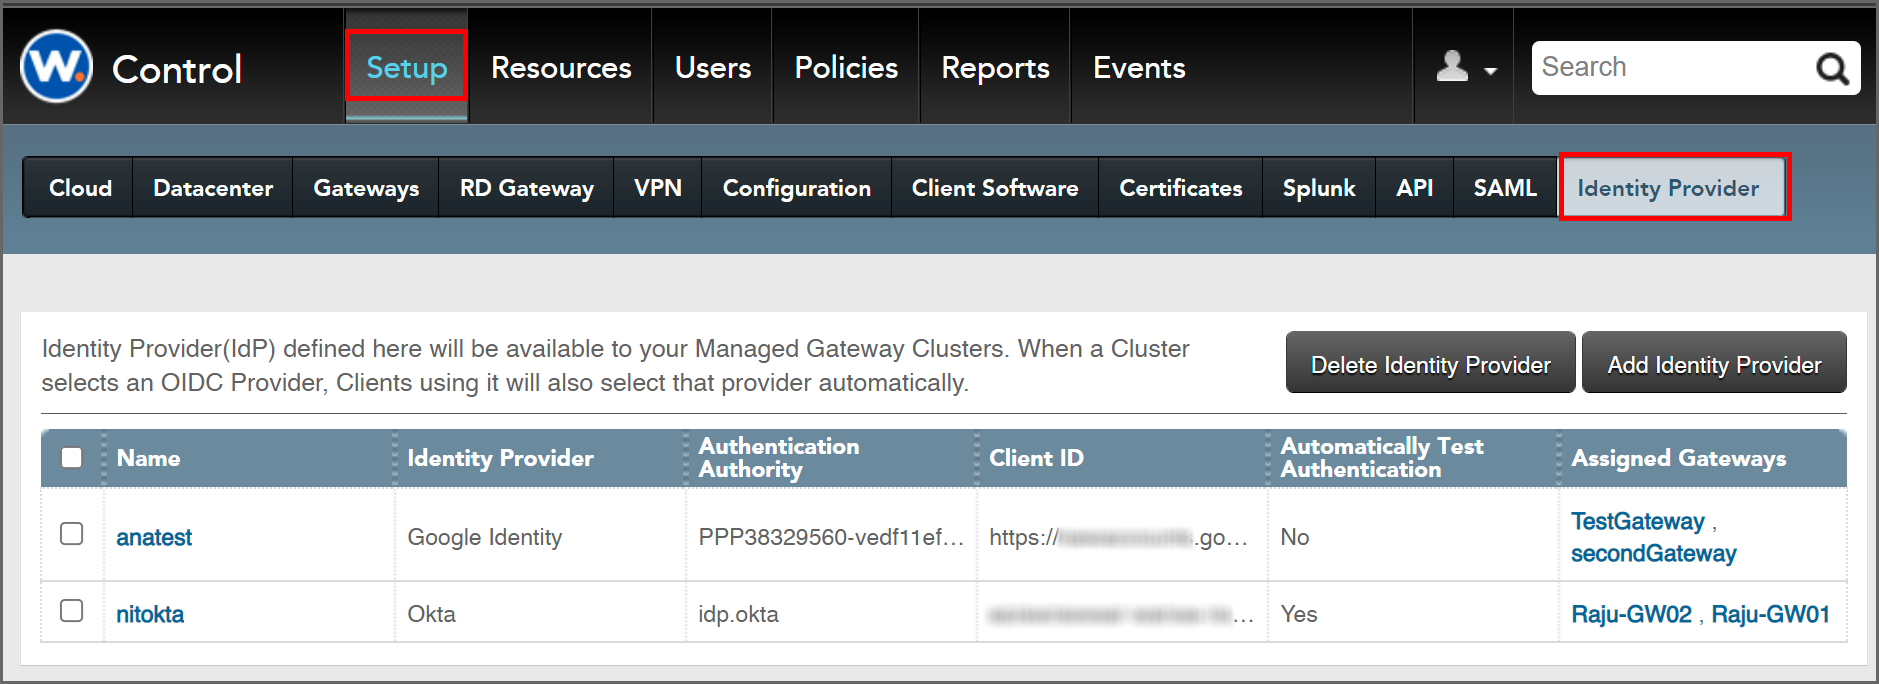
This page summarizes the existing named identity provider rules and lets you add, edit, or delete them.
Nomenclature
Control uses "identity provider" in two different senses:
- The name of the third-party service (Okta is currently supported).
- The name of a specific application integration with a third-party provider.
This document uses "identity provider" to mean the third-party service (initially Okta) and "identity provider profile" to mean an application integration using one of these services.
Adding an Identity Provider Profile
This procedure assumes you've already created an app integration in your identity provider. If you haven't, do that first. See Okta Setup for step-by-step Okta instructions.
GoogleID is present in the menu but is not currently supported.
Click the "Add Identity Provider" Button and fill in the pop-up form.
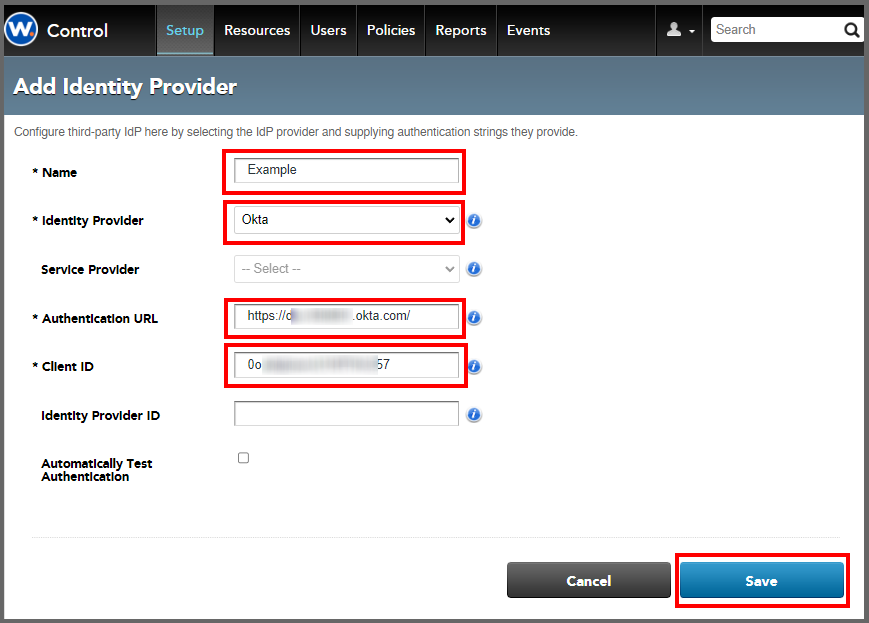
- Name: Choose a descriptive name for this rule.
- Identity Provider: Currently Okta or GoogleID.
- Service Provider: Not used.
- Authentication URL and Client ID: These values are obtained from your identity provider's console.
Getting Client ID from Okta for Control
- Find your "Okta domain" in the pull-down menu in the upper right-hand corner of the admin screen.
- Copy this domain, put "https://" at the beginning of it to make it a URL, and paste it into Control's "Authentication URL " field.
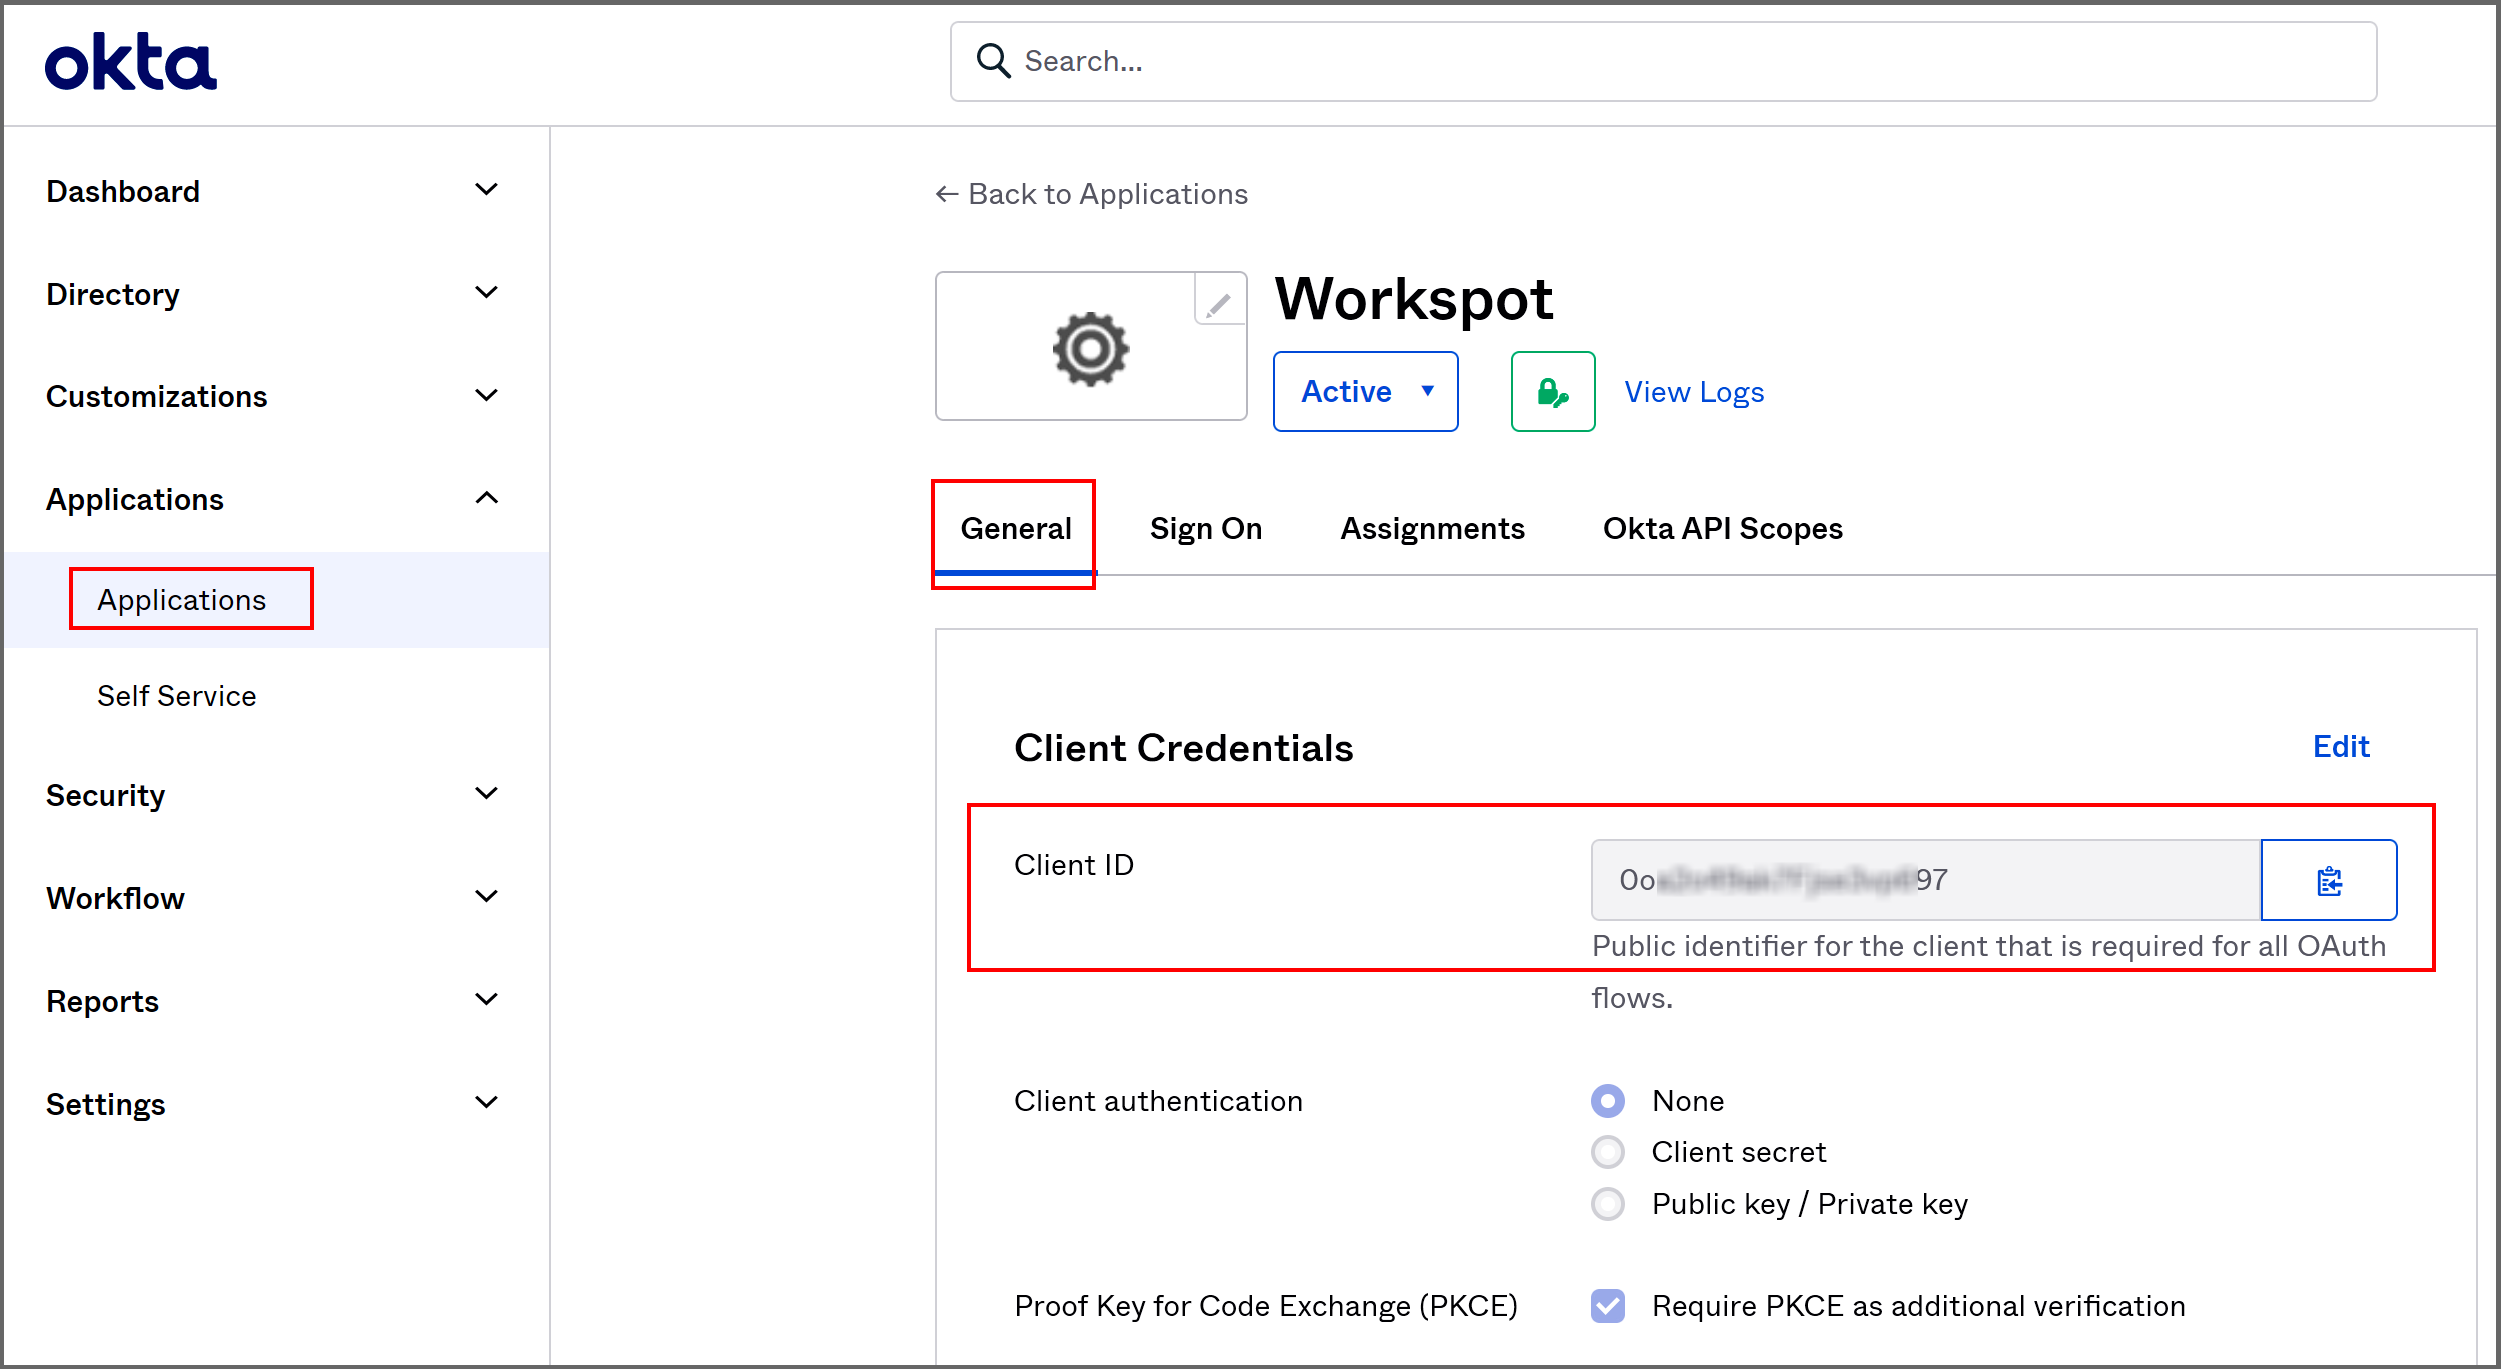
- Find the Okta "Client ID" string in the "General" tab of your Okta App Integration for Workspot.
- Paste it into Control's "Client ID" field.
- Identity Provider ID: Not used, leave blank.
- Automatically Test Authentication: leave deselected.
- Click "Save."
Configuring Public Cloud Gateways (Workspot Managed Gateways)
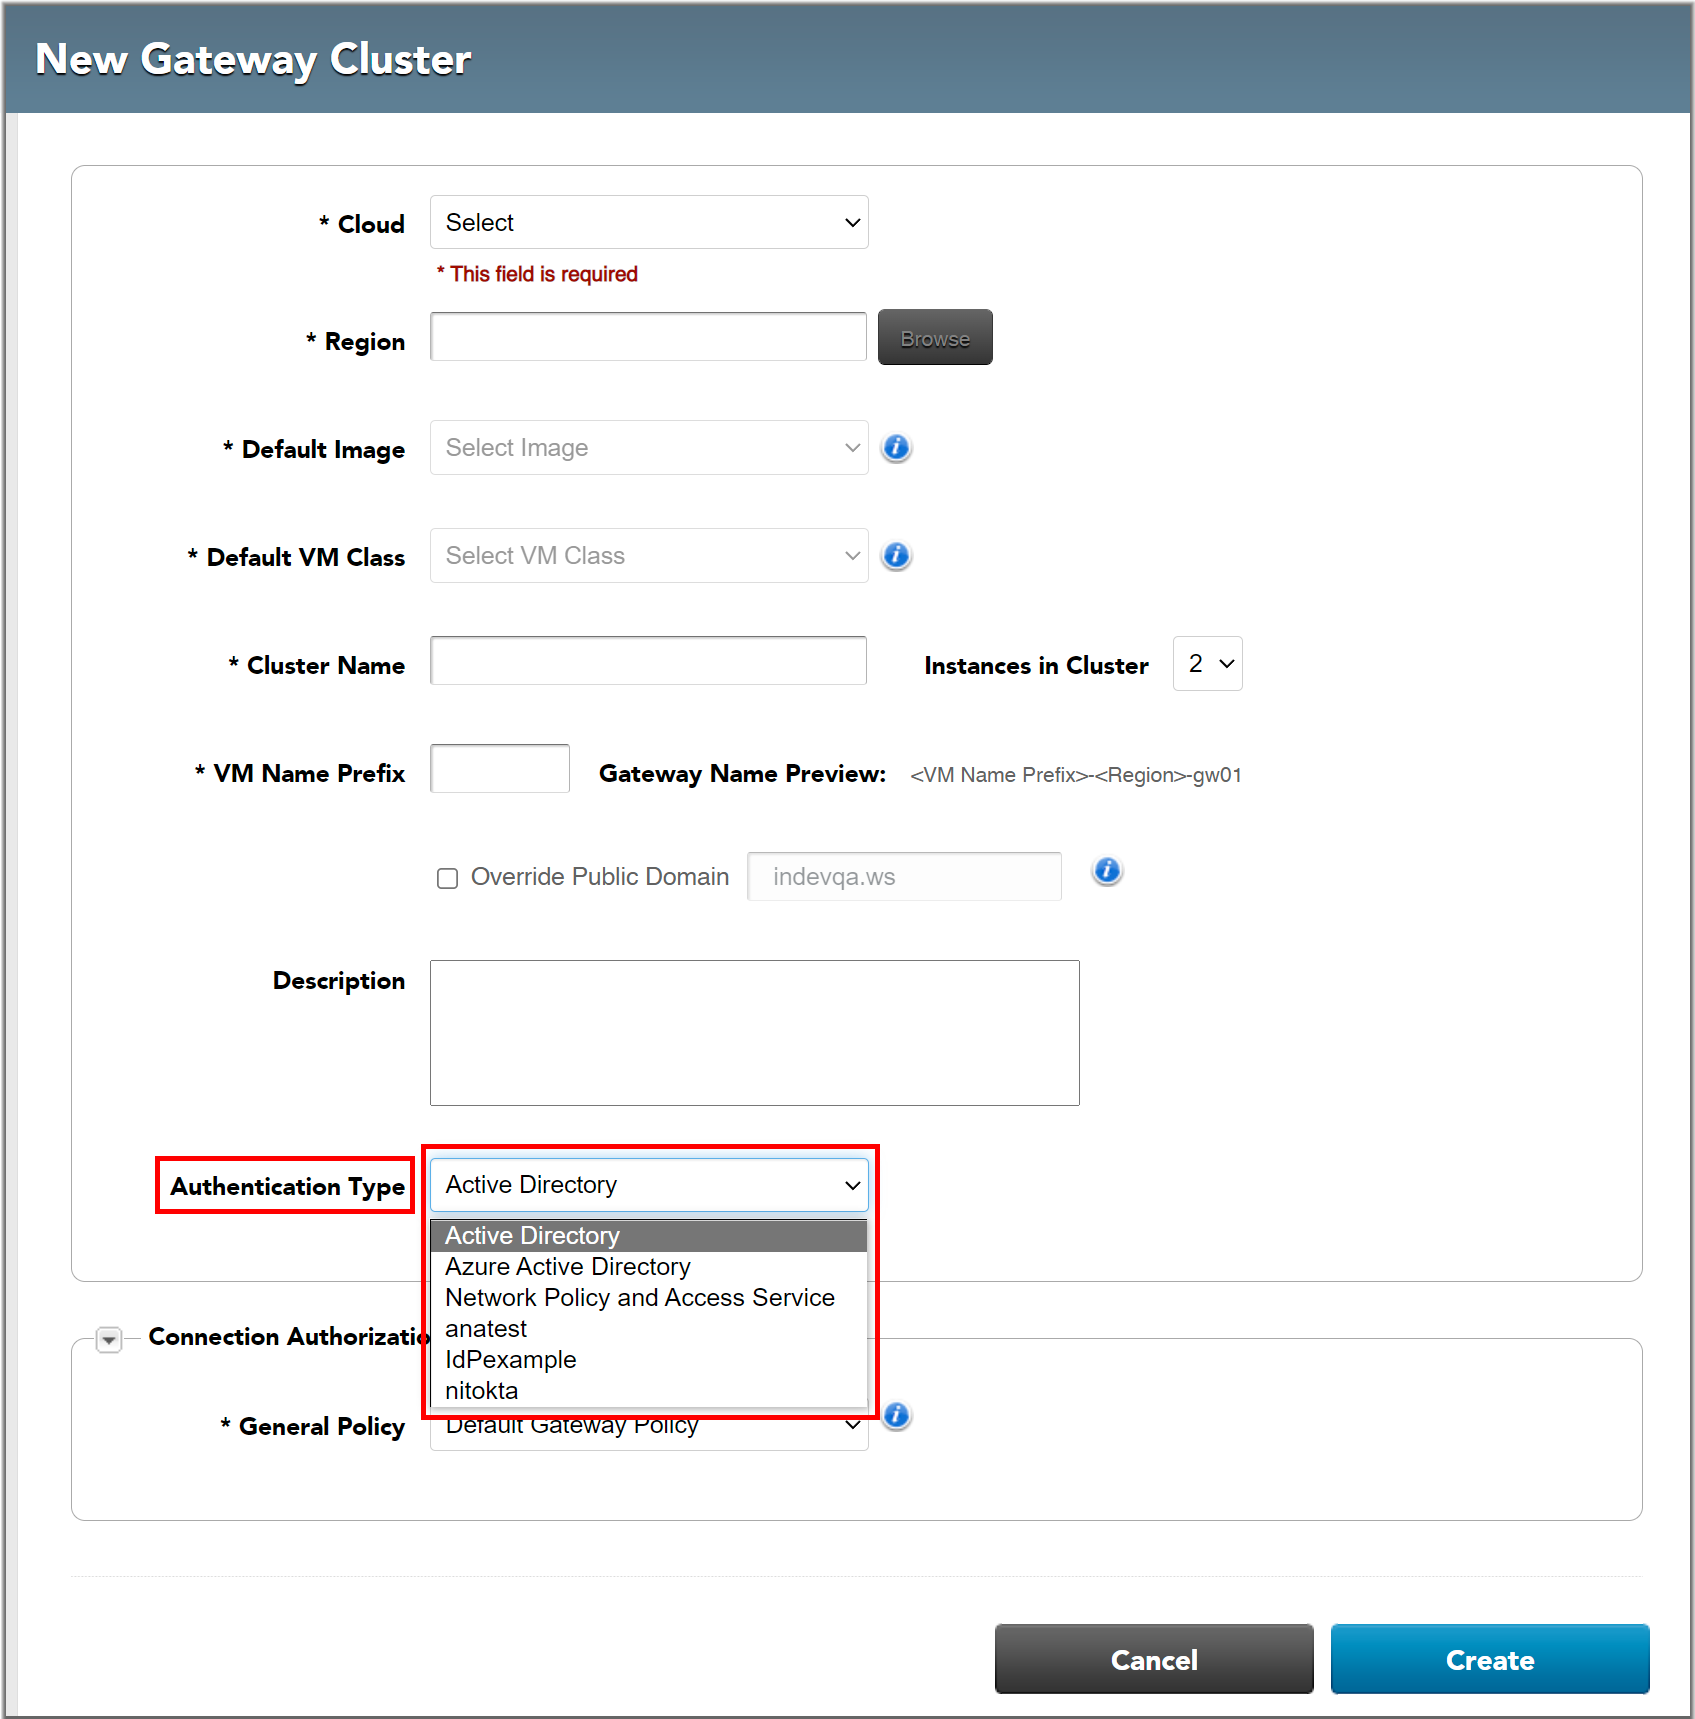
The "Add/Edit Gateway" pages (at "Setup > Gateways > Create Gateway Cluster" and "Setup > Gateways > cluster_name > Actions > Edit") include an "Authentication Type" field. This field can be set to:
- Active Directory
- Azure Active Directory
- Network Policy and Access Service (NPS)
- The Identity Provider Policies you defined above.
Only one of these can be active on a given gateway cluster.
Configuring Customer-Managed Gateways (Private Cloud Gateways)
You must install the Workspot Gateway Plugin, which is a Pluggable Authentication and Authorization (PAA) plugin for the Microsoft Remote Desktop Gateway that runs on Windows Server 2016 or higher. The server does not need to be domain joined. The installation and configuration are designed to be performed manually or be managed by the Workspot Gateway Agent, if installed.
See TBD for details.
Okta Setup
To use Okta as your identity provider you need to create a Native App Integration in your Okta account.
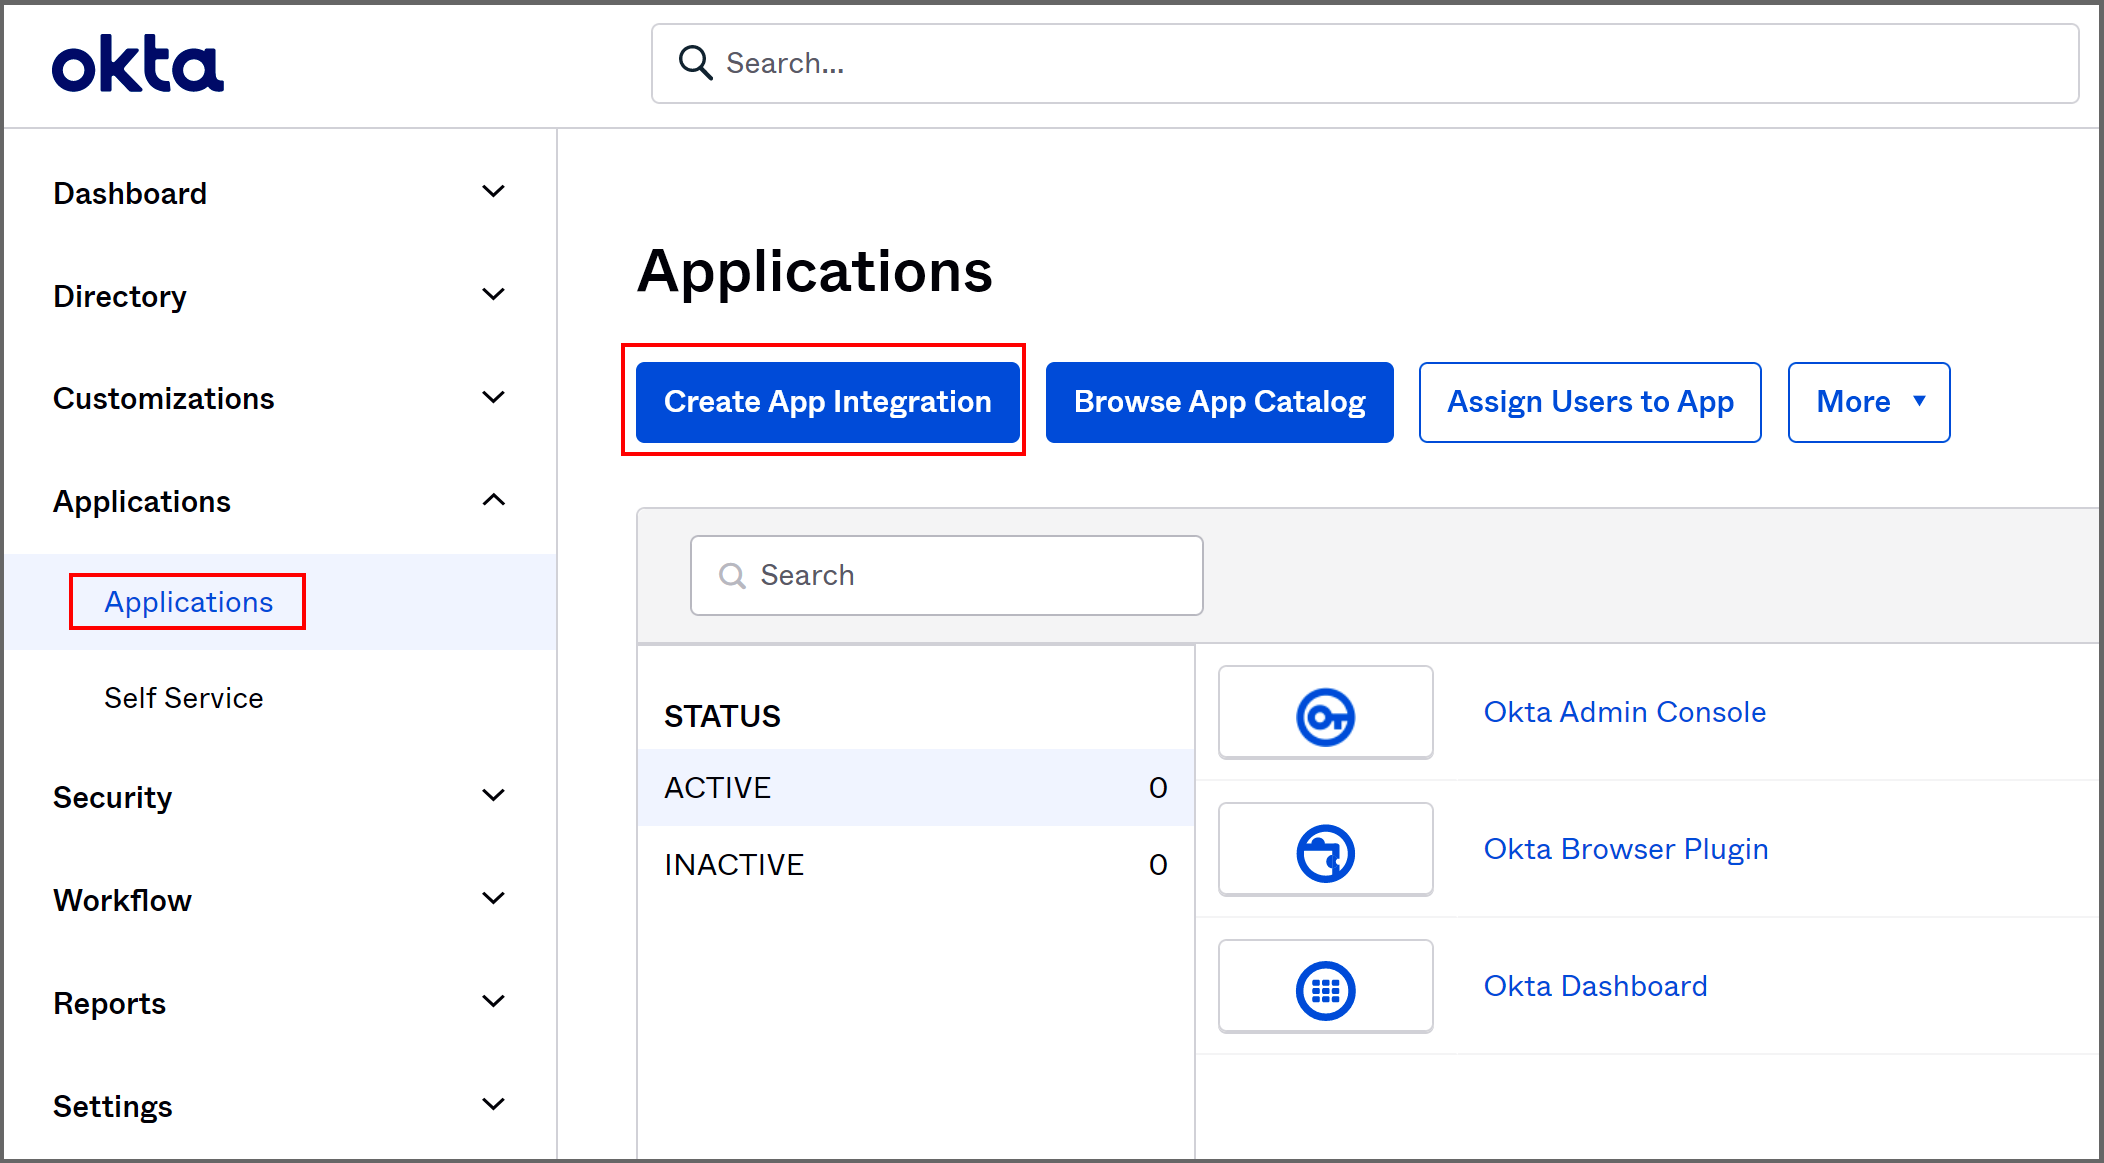
- Sign into Okta at https://login.okta.com and use the "Admin" button to go to the Admin console.
- From the "Applications" page, select "Create App Integration." This opens the "Create a new app integration" page.
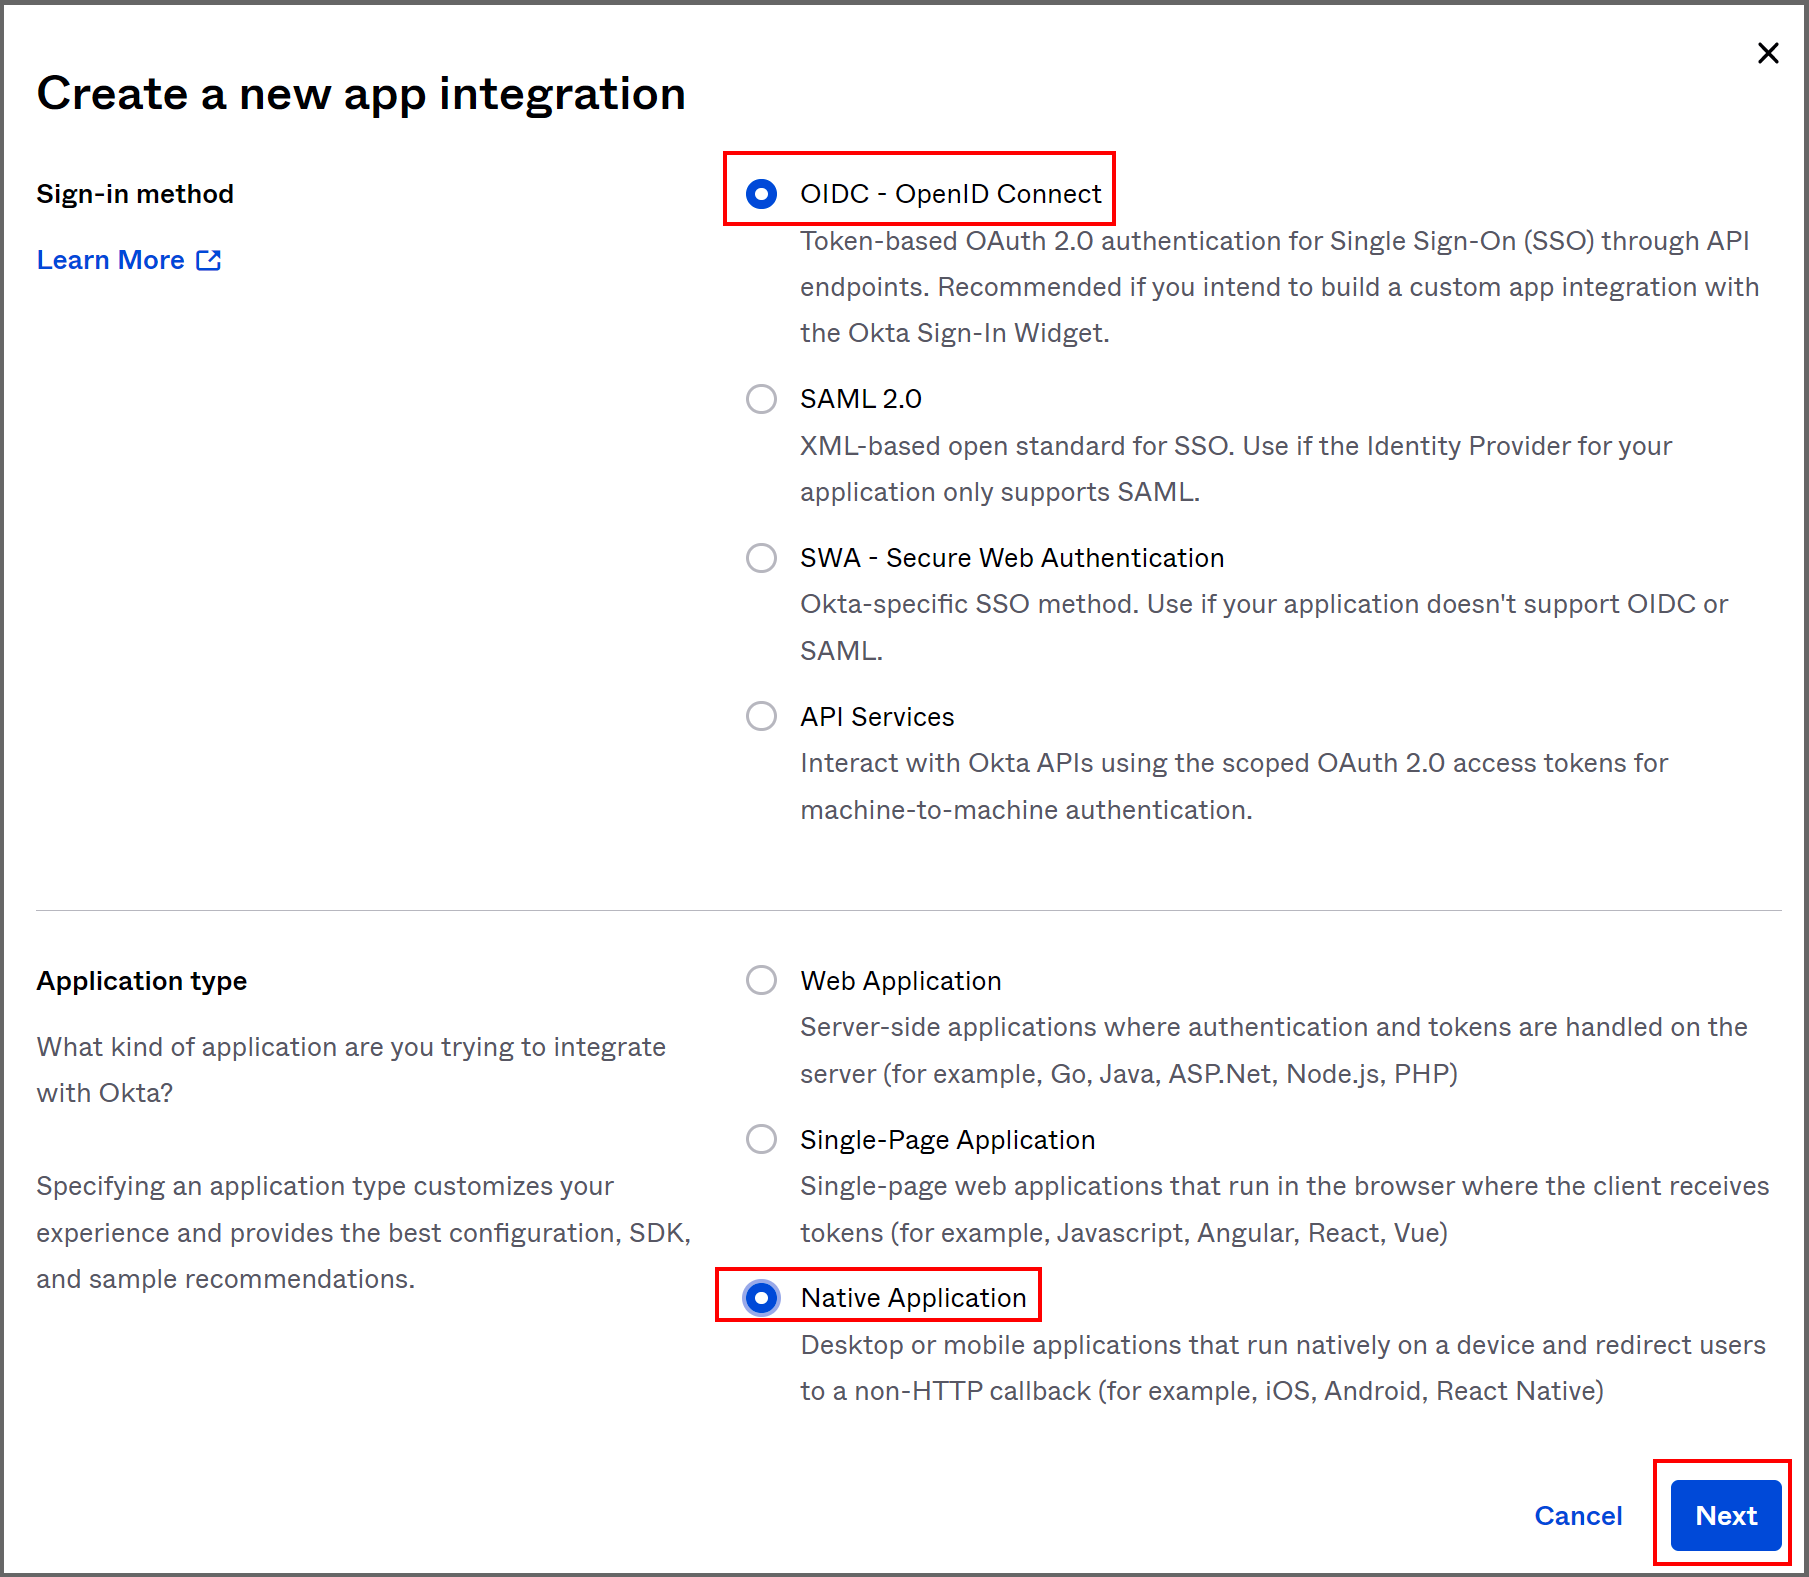
- On the "Create a new app integration" page,
- Select "OIDC - OpenID Connect."
- Select "Native Application."
- Click "Next." This opens the "New Native App Integration" page.
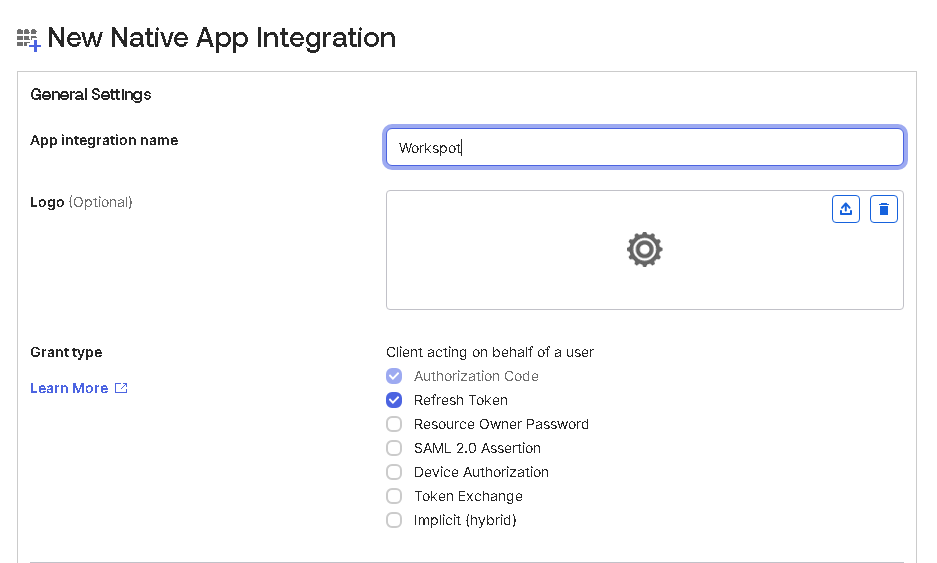
- On the "New Native App Integration" page,
- Choose a name such as "Workspot" for the "App integration name" field.
- Upload your company logo in .png format (optional). Minimum size is 420x120 pixels.
- Set "Grant type" to "Authorization code" and "Refresh token".
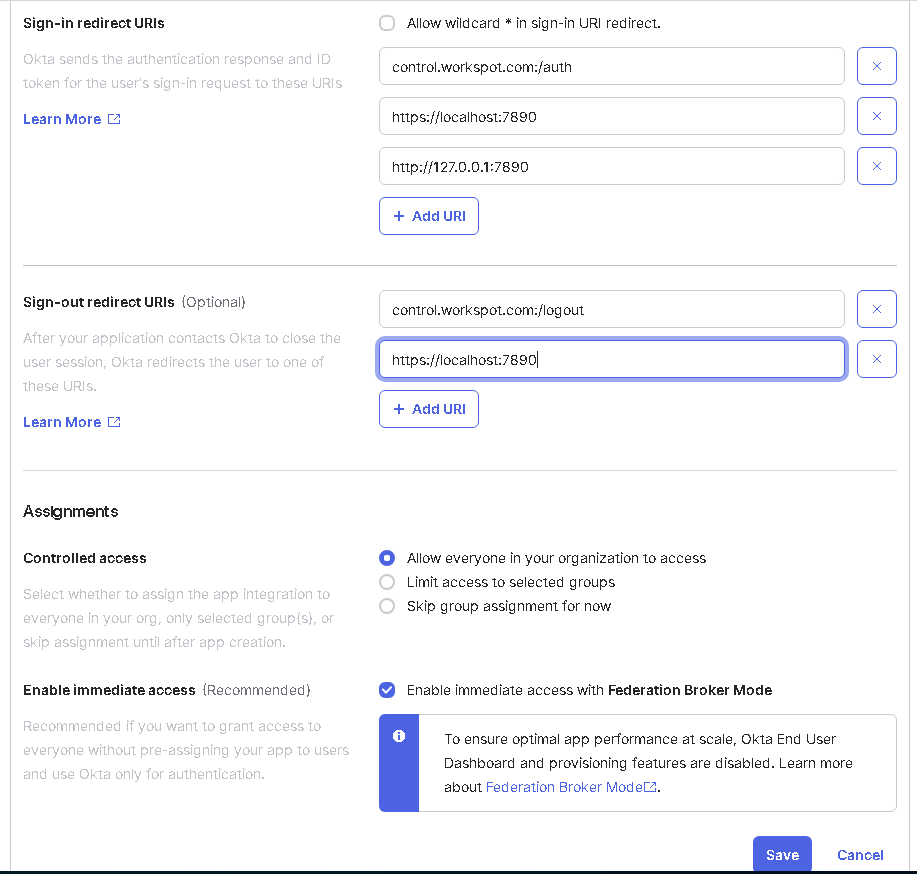
- Delete the default "Sign-in redirect URIs".
- Set the "Sign-in redirect URIs" to "control.workspot.com:/auth", “https://web.workspot.com/auth”, “https://betaweb.workspot.com/auth”, "https://localhost:7890" and “http://127.0.0.1:7890”.
- Set the "Sign-out redirect URIs" to "control.workspot.com:/logout", “https://web.workspot.com/logout”, “https://betaweb.workspot.com/logout”, "https://localhost:7890", and “https://127.0.0.1:7890”.
- Set "Assignments" to "Allow everyone in your organization to access".
- Click "Save".
- Set the sign-in rules for your new app integration to match your organization's policies.
Okta Sign-in Policies
Follow your corporate procedures for sign-in requirements. The following is provided as an example.
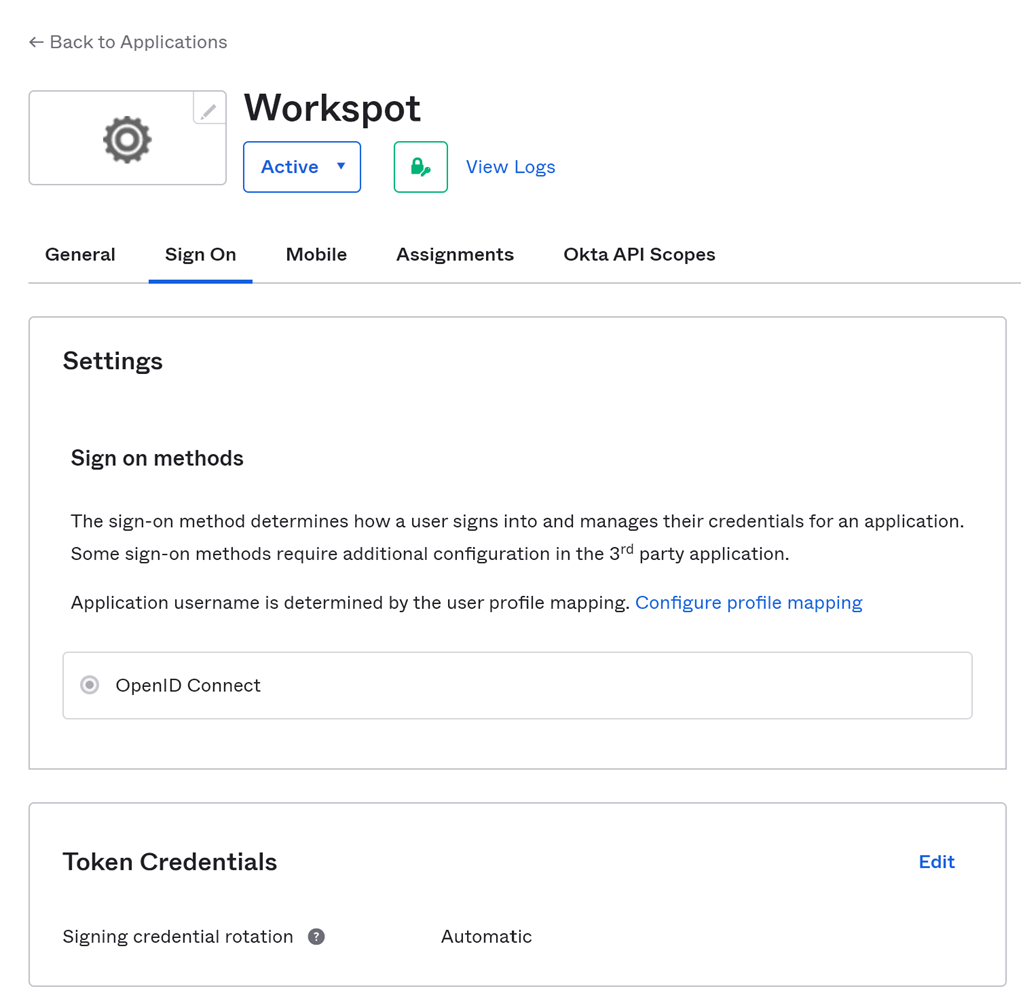
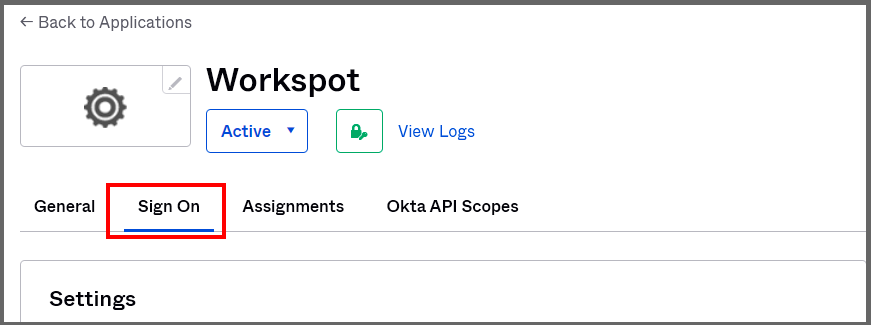
- From the Okta Admin Console, go to "Applications > Applications" and choose your Workspot app integration. Clieck the "Sign On" tab.
- Scroll down to "Sign On Policy" to assign sign-on rules to this app integration.
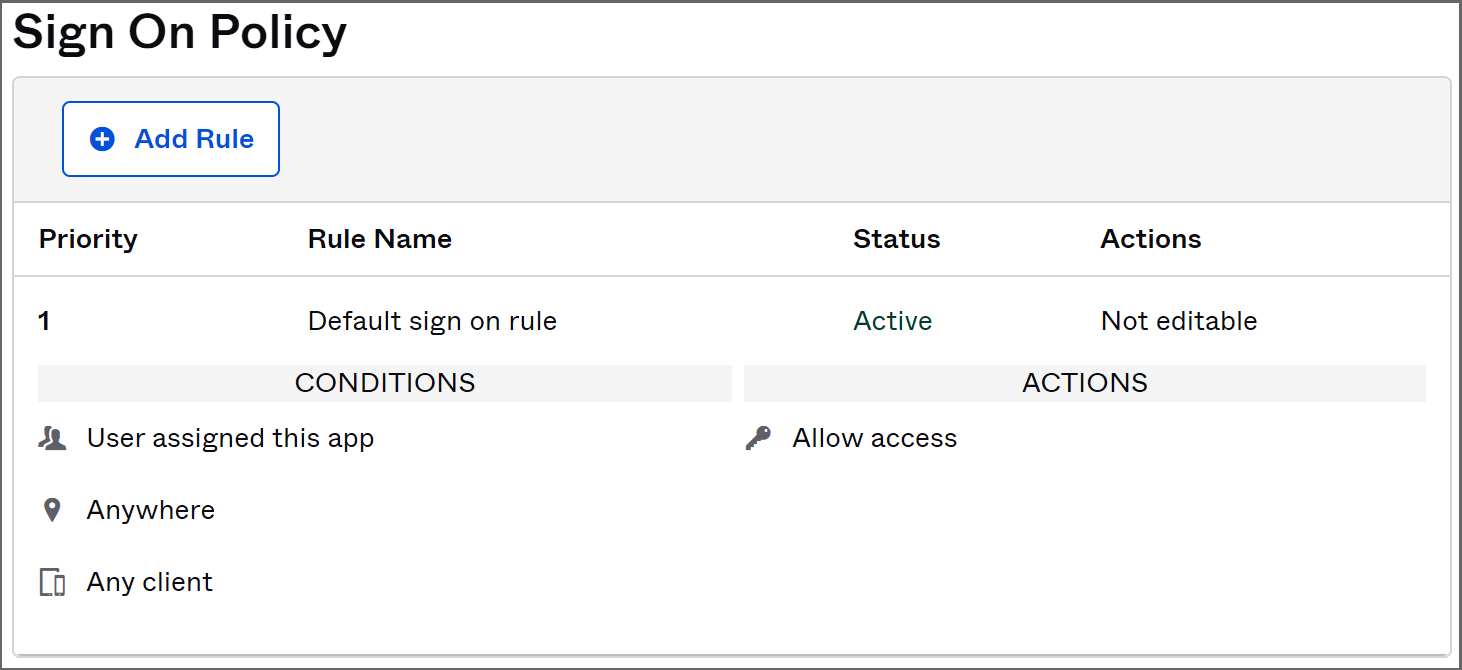
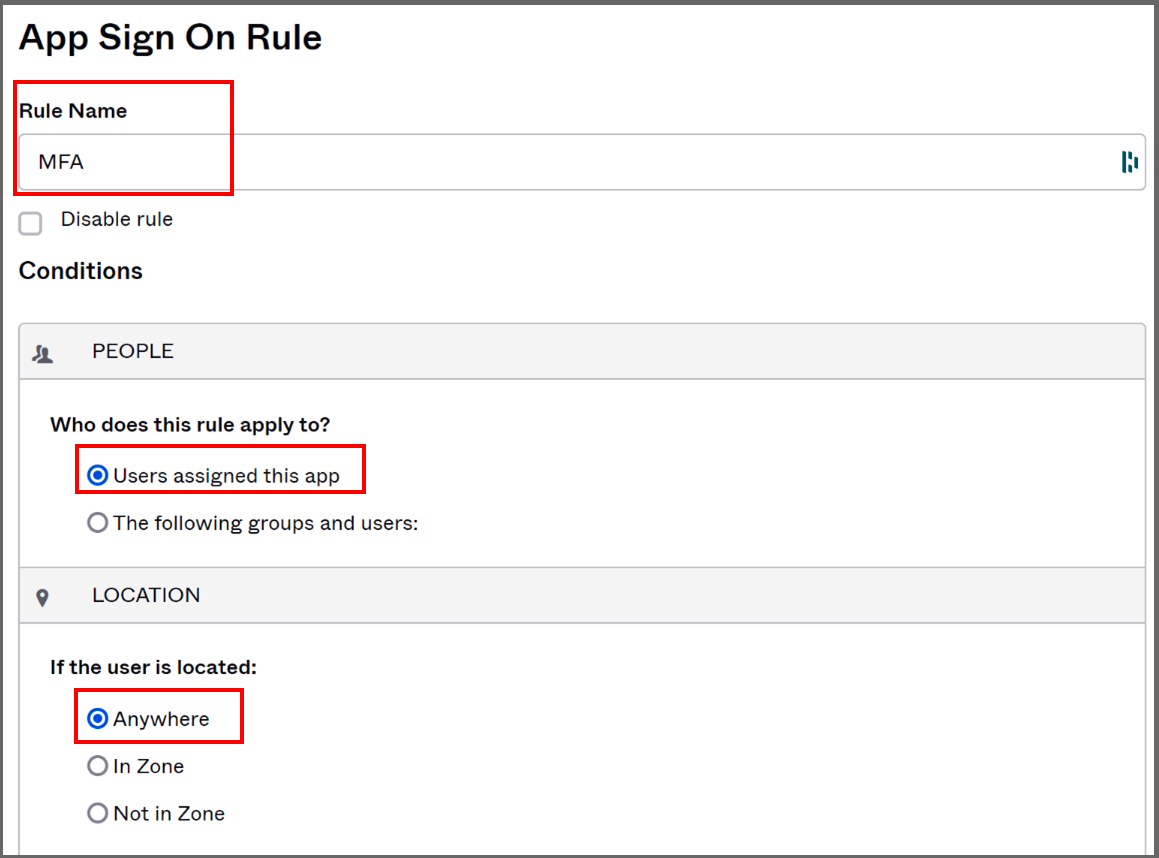
- We will add a rule that requires multi-factor authentication. Click "Add Rule" and fill in the "App Sign On Rule" form. First, choose a name for the rule, select who it applies to ("Users assigned to ths app"), in which geographic zones it applies to ("Anywhere"):
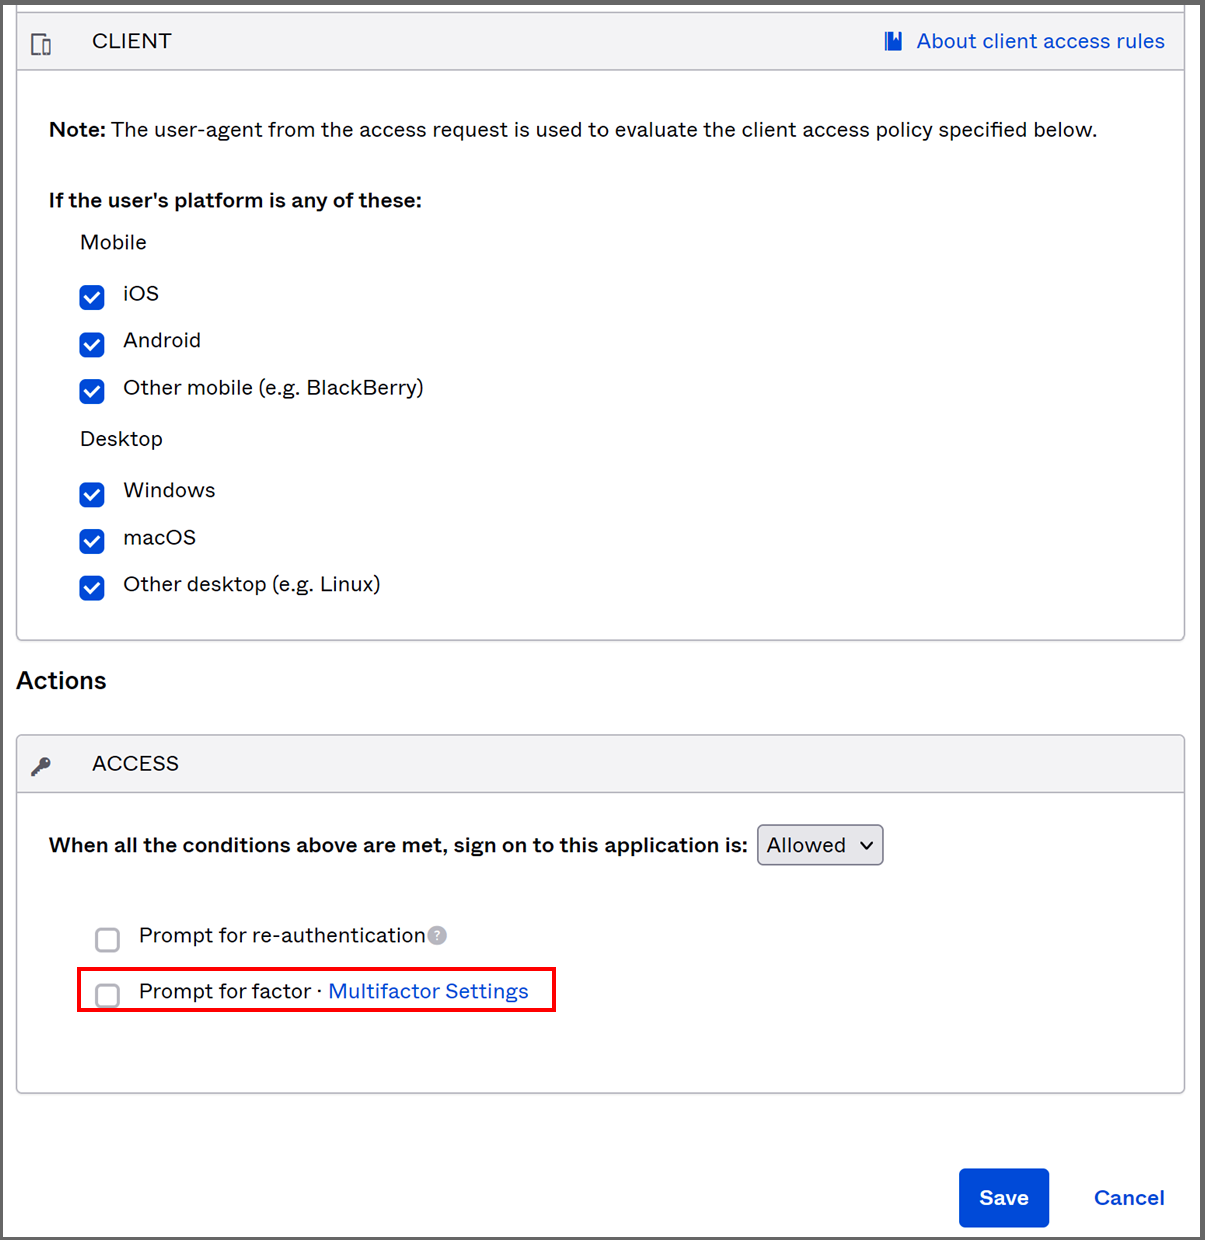
- In the "Client" section, select which devices are allowed to connect (typically all).
- In the Access section:
- Select "Prompt for re-authentication" if you want users to have to reauthenticate mid-session.
- Click the "Multifactor Settings" link to select the correct settings.
- Select how often you want users to have to use MFA.
- Press "Save."
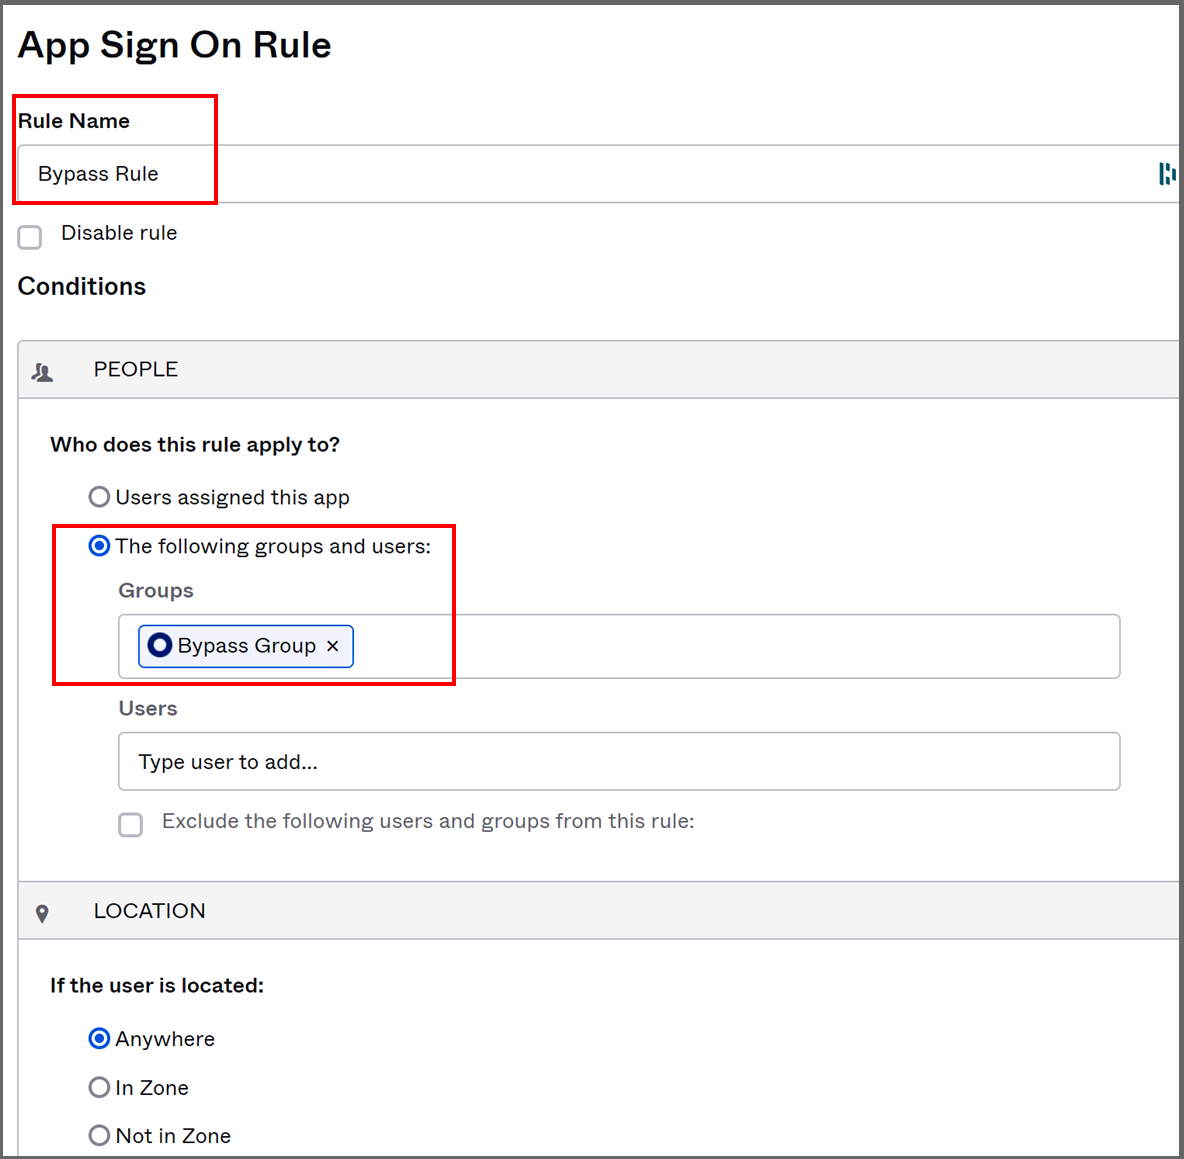
Adding Additional Rules
To add additional rules, such as for a bypass group of users who are not required to use MFA, define them as above, but with different parameters, and arrange the order of the rules in the "Sign-On" page. The first matching rule is used.
Here is an example of a bypass rule: