


Control: Applying Updated Templates to Desktop Pools
Last updated by Robert Plamondon, March 1, 2022
Overview
This document describes how to take an updated, ready-to-publish Workspot desktop template (image) and publish it to a desktop pool.
Persistent Desktops
A Workspot persistent desktop pool gives users a desktop image to use permanently. To update existing desktops, use mechanisms such as Windows Update. When creating new desktops, you will want to update the base template from time to time to prevent it from drifting too far out of date.
Non-Persistent Desktops
A Workspot non-persistent desktop pool gives the user the next available desktop, assigned only for the duration of the login session. The pool's desktop refresh option allows desktops to be automatically reimaged either after every logoff or on a schedule. This keeps them up-to-date and also discards any malware or misconfiguration that may have crept in during the user's session, but means that services such as Windows Update are ineffective on non-persistent pools. Instead, you must keep the master template (image) used to create desktop images up to date.
Updating Templates
The process of updating images is covered in another article: Workspot Agent Installation for Templates.
Applying Templates to Pools
The rest of this document is divided into two parts:
Applying Templates to Non-Persistent Pools
Summary of the Publication Process:
- In Control, go to the Virtual Desktop Pools list and select the Update Image option for the desired pool.
- Select your new template.
- Select when users will have their sessions terminated.
- Launch the update.
1. In Control, Select "Update Image" for Your Pool
- Log into Workspot control as an administrator.
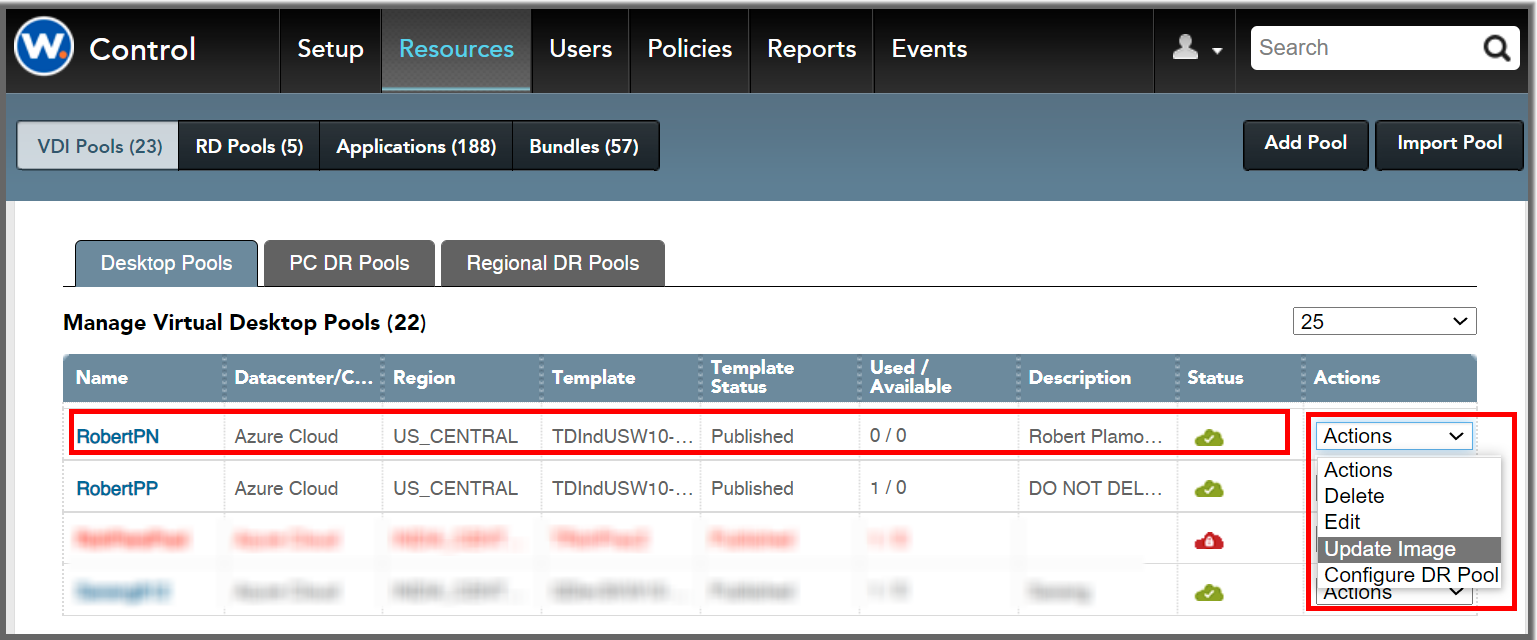
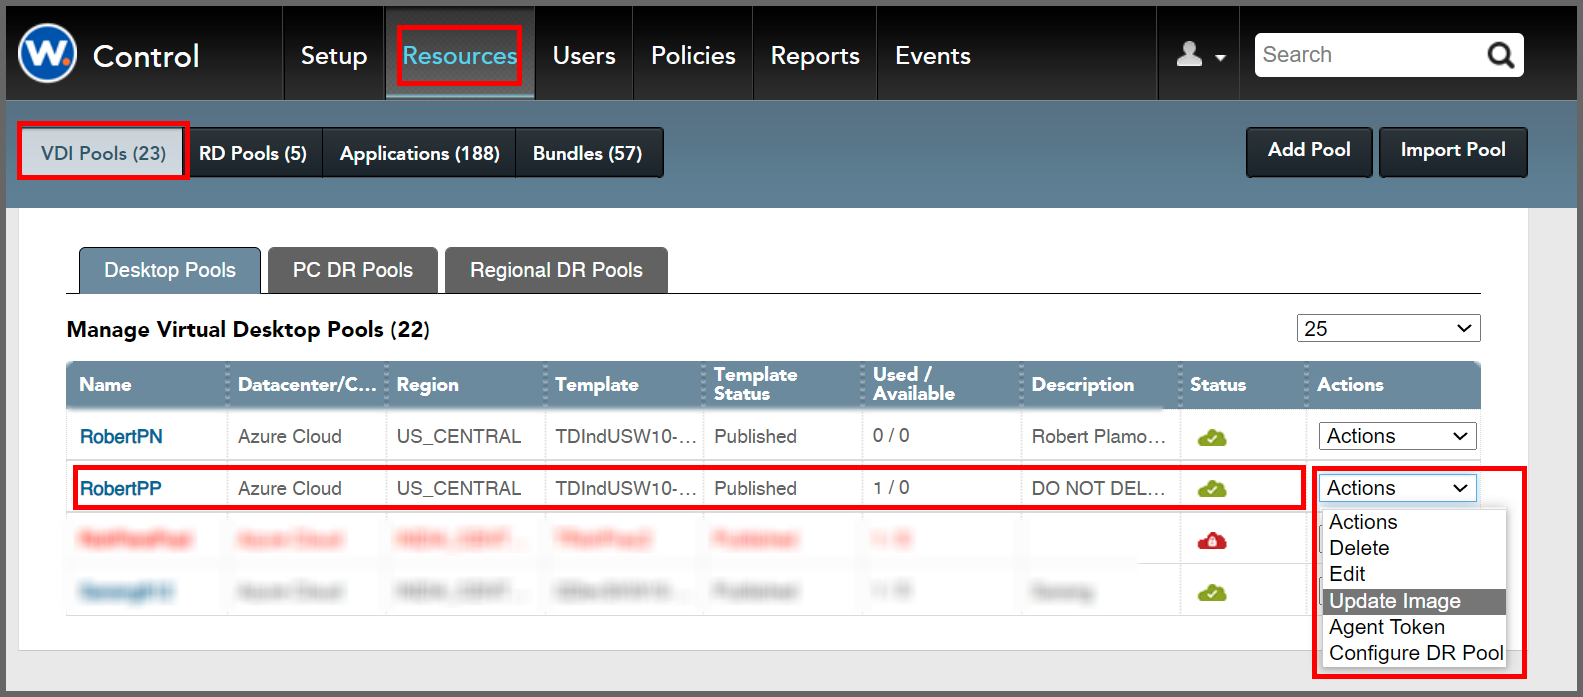
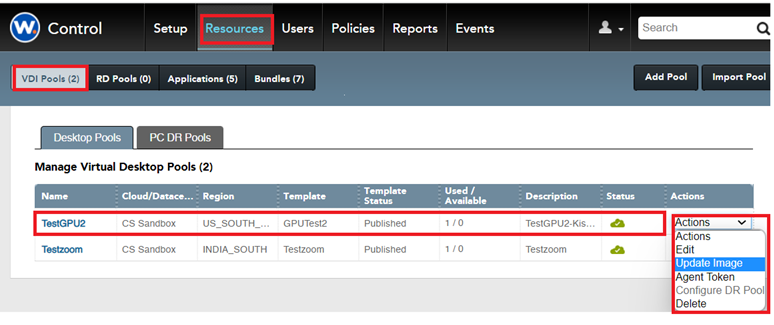
- Go to "Control > Resources > VDI Pools."
- Find your desired pool in the Manage Virtual Desktop Pools table.
- From the drop-down Actions menu in the right-hand column, select Update Image. This will take you to the Update Image page.
2. Select Your New Template
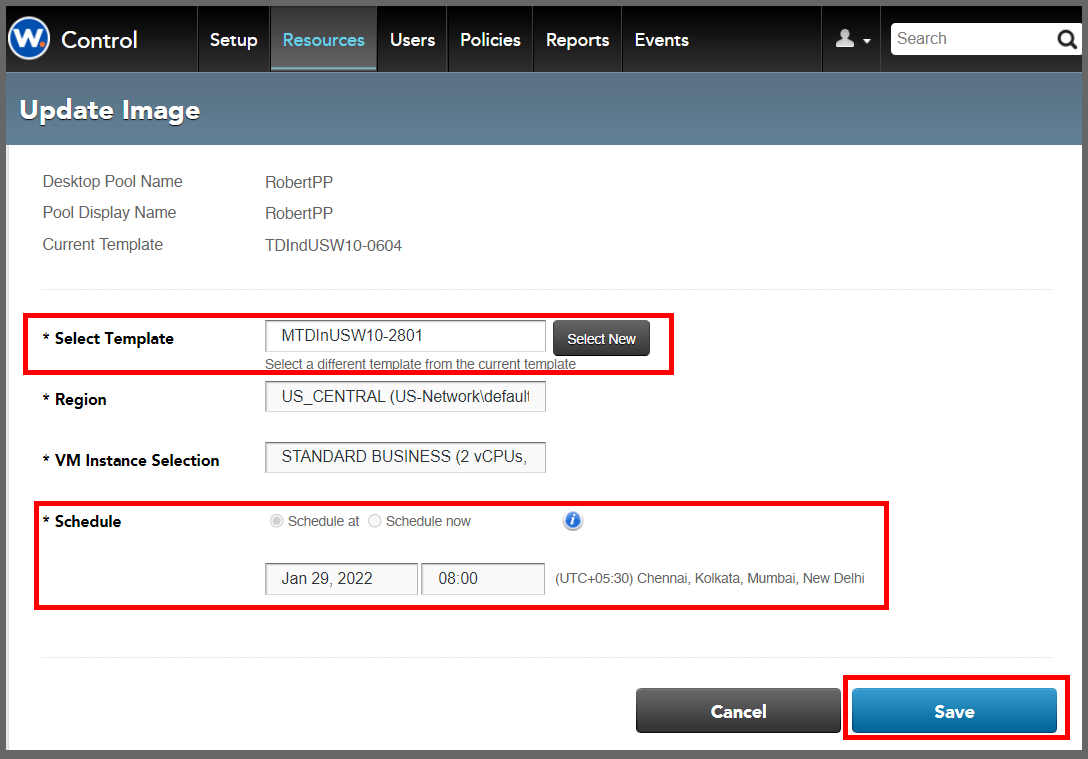
- The Update Image page will show greyed-out Virtual Network and VM Instance Selection fields. This is normal since these are retained from the existing pool and cannot be modified here.
- On the Update Image page, click Select New to pop up the template selection dialog.
- Click the Select button of the desired image. (If it is not shown, use the popup's Search function.) The update image page will be updated with the new selected template.

3. Select When Users Will Have Their Sessions Terminated
The image update process cannot run on active desktops: these desktops will continue to run the old image until the user's session is terminated. Sessions are terminated either through a user logoff or a forced logoff. Users may lose work in a forced logoff.
There are three logoff scheduling options on the Update Image page:
- Schedule now: All VMs are shut down immediately, including ones with logged-in users, then the VMs are reimaged with the new template and rebooted.
- Schedule at: As above, but the shutdown is deferred until the specified time.
- On Log Off: All VMs without logged-in users are shut down immediately, reimaged, and rebooted. VMs with logged-in users are unaffected until the user logs off or the scheduled time is reached, whichever comes first. At this point, the VMs is shut down, reimaged and rebooted. This means that, until at least one VM has been reimaged and rebooted, no users can log into the pool.
Workspot recommends minimizing the loss of user data by either
- using the "Schedule at" option during a period of minimal use, or
- waiting until a period of minimal user and using the "On Log Off" option.
4. Launch the Update
- At the bottom of the Update Image page, click Save. This starts the update process.
- You will be returned to the Resources > VDI Pools page. An animated progress indicator will show that the update is underway.
Applying Templates to Persistent Pools
Non-Destructive and Destructive Modes
There are two ways of applying a new template to a persistent pool: non-destructive mode and destructive mode.
-
Non-Destructive mode (default, recommended) simply tells Control to use the new template the next time it creates a desktop for the pool. No existing desktops are touched.
-
Destructive mode replaces all desktops, including those assigned to users, with fresh desktops created from the template. All user-installed programs and personalization are lost.
Non-destructive mode
This is the normal, default, recommended mode. The new template is specified but is not applied until you create a new desktop.
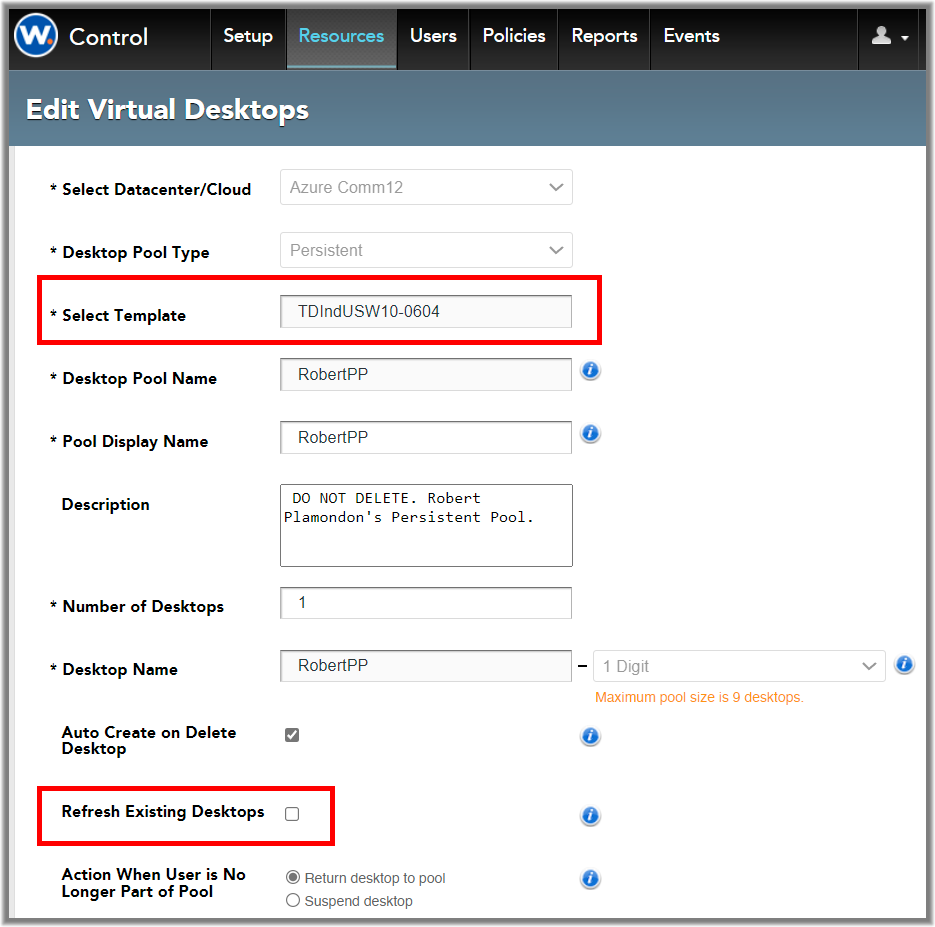
- This mode is used when the "Refresh Existing Desktops" box is not selected on "Add/Edit Pool" page ("Resources > poolname > Actiions > Edit").
- Control uses the new template for new desktops, but existing desktops are not affected.
- Since no actual desktops are affected, no scheduling is required.
To apply a template non-destructively to a pool:
- Go to "Resources > poolname > Actions > Edit."
- Verify that the "Refresh Existing Desktops" box is not selected. If it is, deselect it.
- Go to "Resources > poolname > Actions > Update Image."
- On the "Update Image" page, ignore the text input box (which does nothing) and press the "Select New" button.
- In the "Select a Template" popup, ignore the search box (which is unnecessary) and press the "Search" button.
- Available templates are shown at the top of the list, each with a "Select" button. Below it are templates that are not suitable for this pool. Click the "Select" button for the correct template.
- Back on the "Update Image" page, verify that the date/time fields "Schedule" fields are inoperable. If they work, STOP. HIt "Cancel" and go back to Step 1. You need to deselect the "Refresh Existing Desktops" box.
- Press "Save" to apply the desktop template.
-
You can delete any unassigned VMs and reimage them after the new template is assigned to ensure that new users get a desktop with the current template. (Unassigned desktops are the ones that don't show an email address in the "Email" column under "Resources > VDI Pools > poolname.")
- If you set the "Auto Create on Delete Desktop" option for the pool, under "Resources > VDI Pools > poolname > Edit," you can simply delete all the unassigned desktops after applying the new template, and Control will reimage them automatically.
- If "Auto Create on Delete Desktop" is not set, apply the new template, delete the unassigned desktops, then go to "Resources > VDI Pools > poolname > Edit" and increase the pool size to provide the desired number of spares.
Destructive Mode
WARNING! Desktops reimaged by destructive mode cannot be restored from Workspot backups.
This mode reimages all desktops, including ones assigned to users All programs and personalization installed by the user are lost.
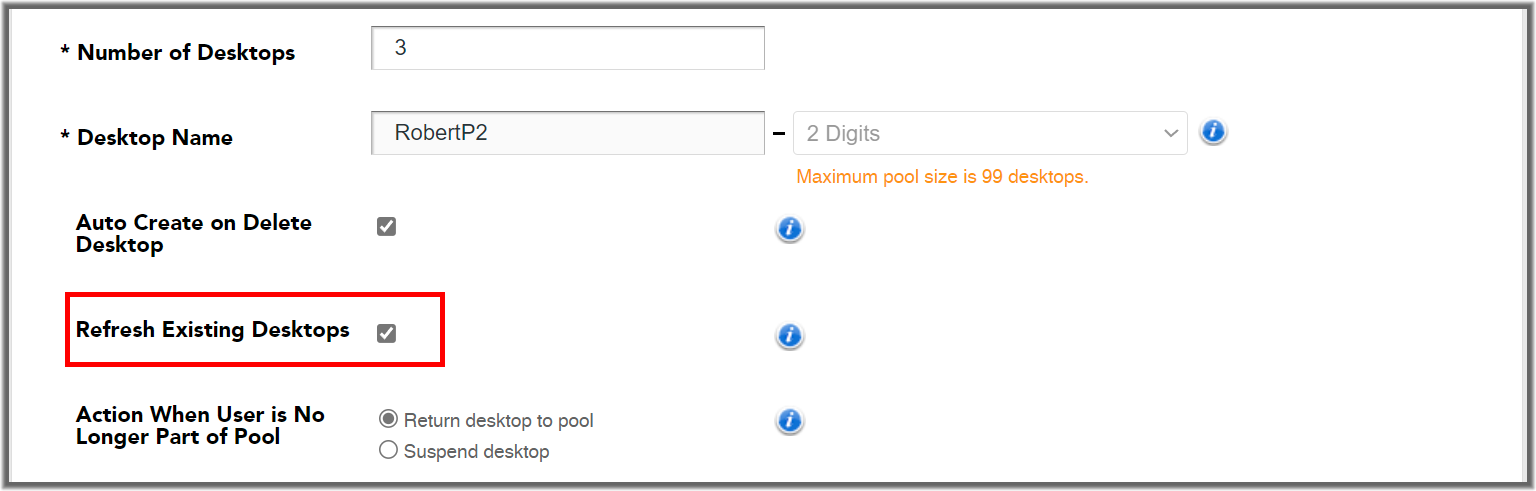
- This mode is used when the "Refresh Existing Desktops" box is selected on the "Add/Edit Pool" page ("Resources > VDI Pools > poolname > Actions > Edit").
- Never select this mode when creating a pool. Enable it only when you are about to reimage assigned desktops.
- Disable this mode again after the desktops are reimaged.
To apply a template destructively to a pool:
- Go to "Resources > poolname > Actions > Edit."
- Select the "Refresh Existing Desktops" box and press "Save." For this and later steps, see the screen captures below.
- If you want to preserve some assigned desktops while reimaging others, see Protecting Desktops in Destructive Mode (Image Lock) below.
- Go to "Resources > poolname > Actions > Update Image."
- On the "Update Image" page, ignore the text input box (which does nothing) and press the "Select New" button.
- In the "Select a Template" popup, ignore the search box (which is unnecessary) and press the "Search" button.
- Available templates are shown at the top of the list, each with a "Select" button. Click the "Select" button for the desired available template.
- Back on the "Update Image" page, set the "Scheduling" fields to reimage the pool with the new template either now or at the specified date/time.
- Press "Save." If you selected "Now" as the time to reimage, reimaging will start at once.
- If you scheduled reimaging for later, it will start at the specified time. In the meantime, most pool management functions are locked.
- The speed of the process depends on the Cloud provider. Expect it to take no more than a few minutes per desktop.
- Once the desktops are reimaged, go to the Pool Details page ("Resources > VDI Pools > poolname") and verify that the new template is shown in the "Template" field for every desktop that wasn't image-locked (image-locked desktops keep their old image and old template).
- Go to "Resources > poolname > Actions > Edit" and deselect the "Refresh Existing Pools" box. This will eliminate the possibility that someone might do a destructive reimage later when they only meant to specify a new template.

Protecting Desktops in Destructive Mode (Image Lock)
The Image Lock feature allows you to mark desktops in the pool as immune to reimaging. These desktops will be skipped during the reimaging process.
To lock images in a pool:
- Enable "Refresh Existing Desktops" on the Add/Edit Pool page ("Resources > VDI Pools > poolname > Actions > Edit). Images can't be locked unless this mode is enabled. For this and later steps, see the screen captures below.
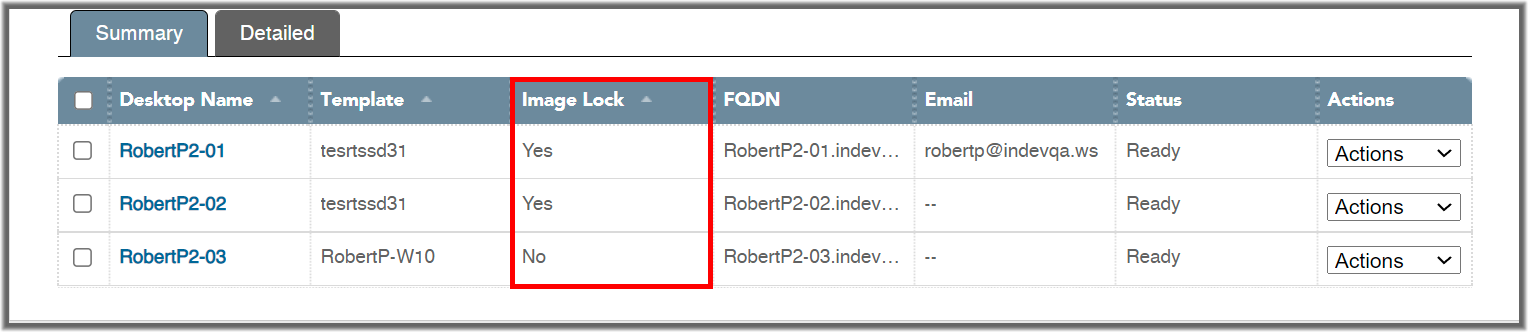
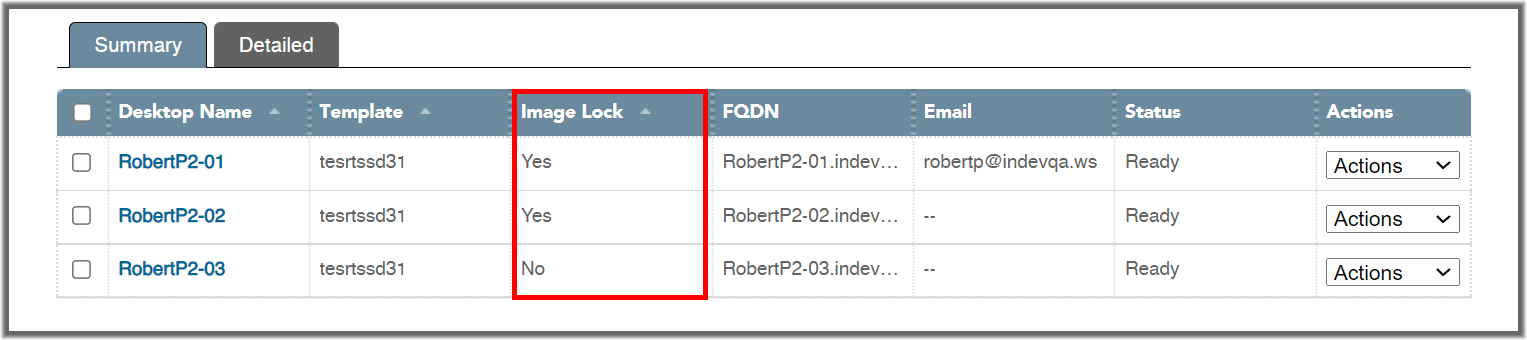
- Go to the Pool Details page ("Resources > VDI Pools > poolname"). The lock state of each desktop is given in the "Image Lock" column.
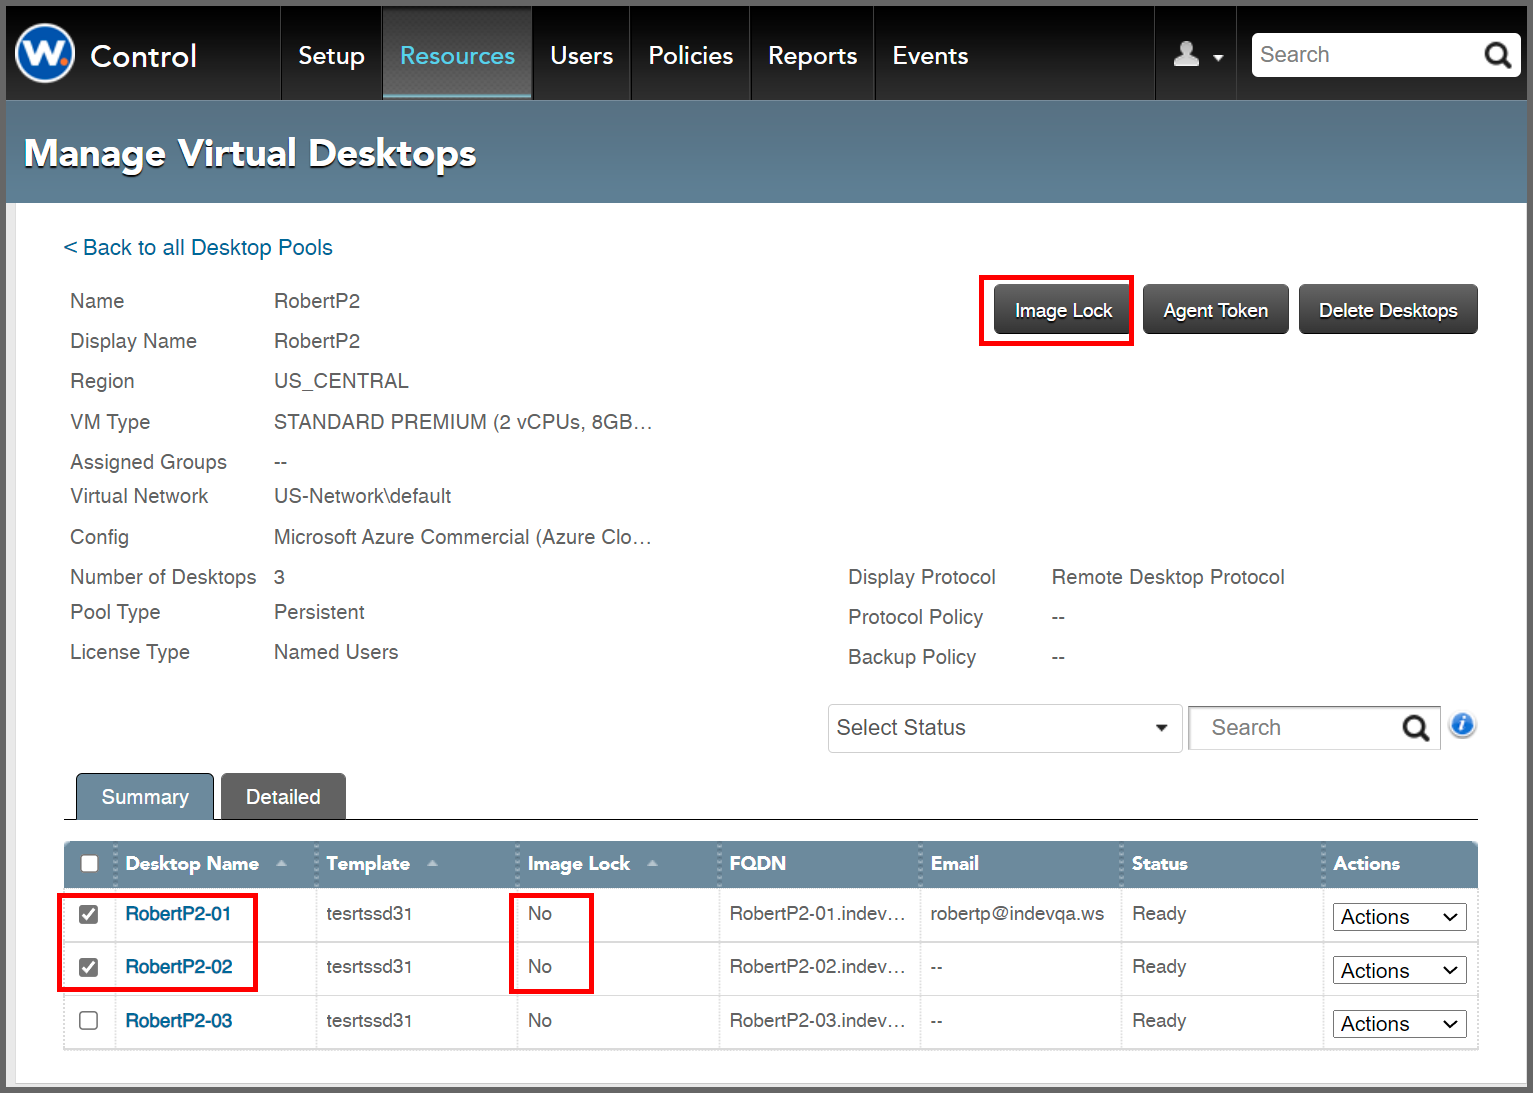
Note: The Pool Details page has both an "Image Lock" button at the top of the page and an "Image Lock" column in the desktop list.
Note: The "Image Lock" button is grayed out and inactive whenever "Refresh Existing Desktops" mode is not enabled, when no desktops are selected, and when the selected desktops are not all in the same Image Lock state. When the button is active, it toggles the selected desktops to the opposite Image Lock state from before.
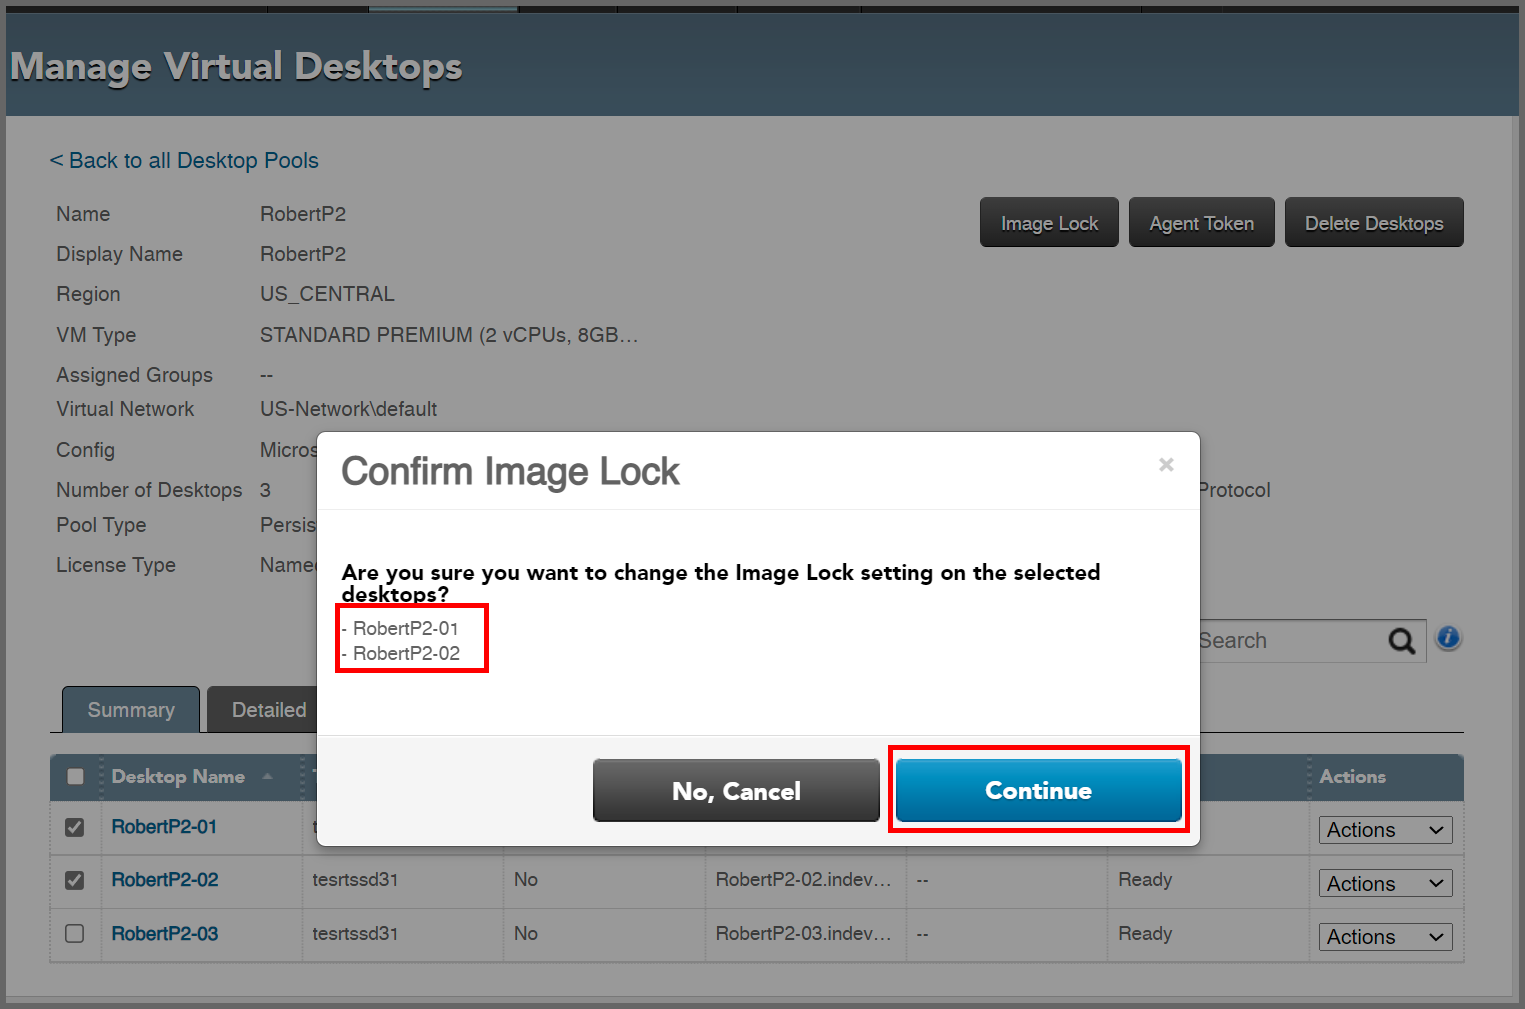
- For each desktop whose image lock state you want to change, select its checkbox on the leftmost column.
- Press the "Image Lock" button at the top of the screen. Once you confirm the change, each desktop will have the opposite lock state from before.
- Verify that the desktops show the desired image lock state in the updated "Image Lock" column.
- Continue applying the new template by going to step 4 in "To apply a template destructively to a pool."
Control remembers the per-desktop settings for Image Lock, so once set, you can use them for multiple partial-pool reimagings, but be sure to check them before each use.

© 2022 Workspot